Unity Tutorial Part 1: Getting Started
In this Unity tutorial series, newly updated for Unity 2018.1, you’ll learn how to make your first game in Unity with C# from scratch: a twin-stick shooter called Bobblehead Wars!

Version
- C# 7.2, Unity 2018.1, Unity
 This is an excerpt taken from Chapter 1, “Hello Unity” of our book Unity Games by Tutorials, newly updated for Unity 2018.1, which walks you through creating four Unity games from scratch — and even shows you how to develop for VR in Unity. Enjoy!
To say game development is a challenge would be the understatement of the year.
Until recently, making 3D games required low-level programming skills and advanced math knowledge. It was akin to a black art reserved only for super developers who never saw the sunlight.
That all changed with Unity. Unity has made game programming into a craft that’s now accessible to mere mortals. Yet, Unity still contains those complicated AAA features so, as you grow as a developer, you can begin to leverage them in your games.
Every game has a beginning and so does your learning journey — and this one will be hands-on. Sure, you could pore over pages and pages of brain-numbing documentation until a lightbulb appears above your head, or you can learn by creating a game.
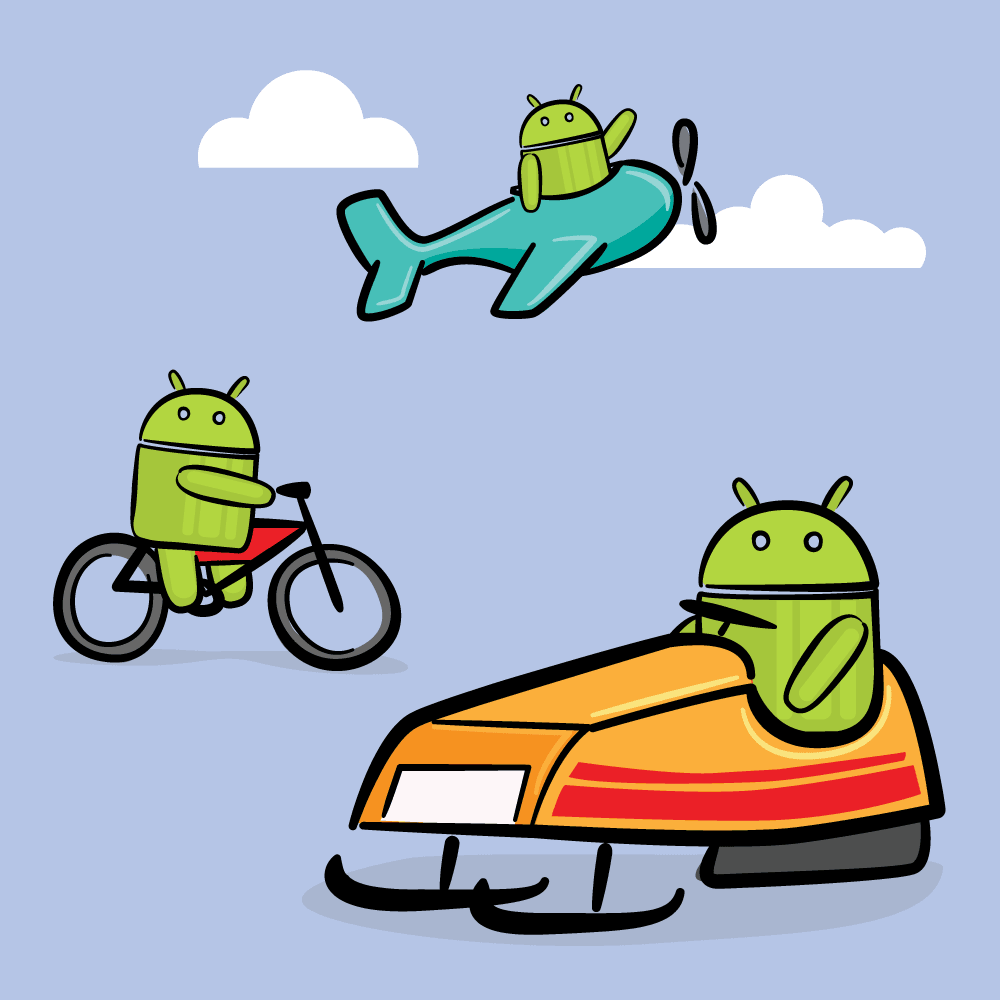
You obviously would prefer the latter, so in this tutorial, you’ll build a game named Bobblehead Wars.
In this game, you take the role of a kickass space marine, who just finished obliterating an alien ship. You may have seen him before; he also starred in our book 2D iOS & tvOS Games in a game called Drop Charge.
After destroying the enemy ship, our space marine decides to vacation on a desolate alien planet. However, the aliens manage to interrupt his sun tan — and they are out for blood. After all, space marines are delicacies in this part of the galaxy!
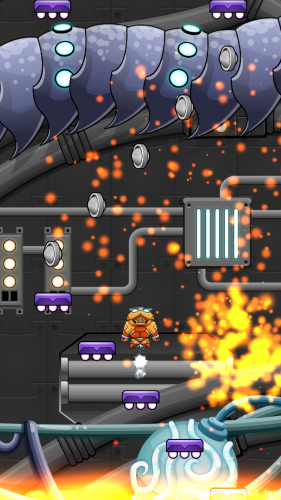
This game is a twin-stick shooter, wherein you blast hordes of hungry aliens that relentlessly attack:
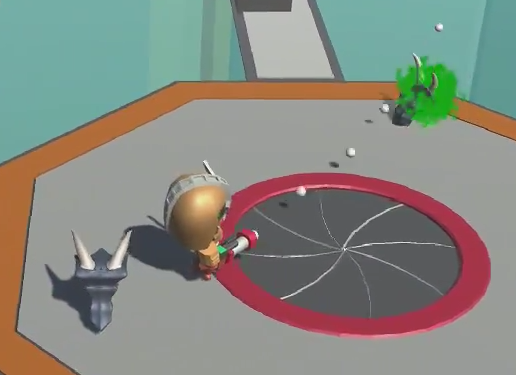
You’ll toss in some random powerups to keep gameplay interesting, but success lies in fast footwork and a happy trigger finger.
Installing and Running Unity
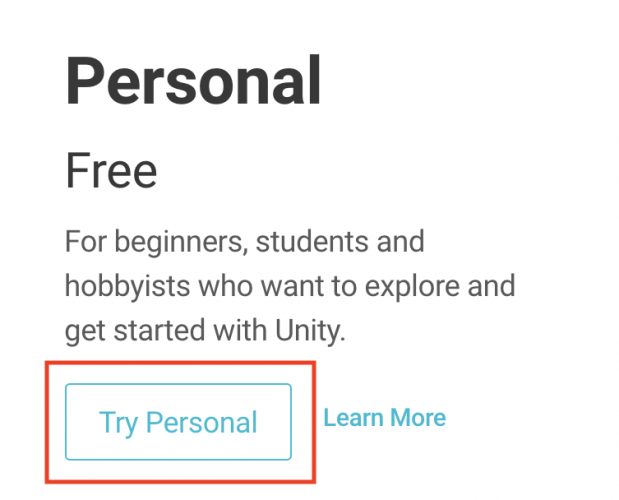
Before you can take on aliens, you need to download the Unity engine itself. Head over to the following URL: https://unity3d.com/get-unity. You’ll see a page with many options from which to choose:
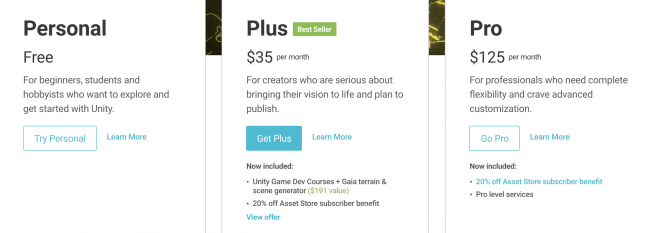
You can go Pro if you’d like, but it’s excessive at this stage of your journey. For this tutorial, you only need the free version. In fact, you can even release a complete game and sell it on Steam with the free version.
Before Unity 5, certain engine features were disabled in the free version. Now, all those closed-off features are now available to everybody who uses the personal version.
In case you are curious, here are what the three options mean:
- Unity Personal: This edition allows you to create a complete game and distribute it without paying Unity anything. However, your company must make less than $100,000 per fiscal year. The other catch is that each game will present a “Made by Unity” splash screen that you can’t remove.
- Unity Plus: This edition costs $35 per month. It comes with performance-reporting tools, the Unity Pro skin and some additional features. This version requires your company to make less than $200,000 per year, and it allows you to either disable or customize the “Made by Unity” splash screen.
- Unity Pro: This is the highest tier available. It costs $125 per month and comes with useful Unity services, professional iOS and Android add-ons, and has no splash screen. There is no revenue cap either.
There’s also an enterprise edition for large organizations that want access to the source code and enterprise support.
Under Personal, click Try Personal and download the software from the following page.
Give it a moment to download then double-click it to start the installation.
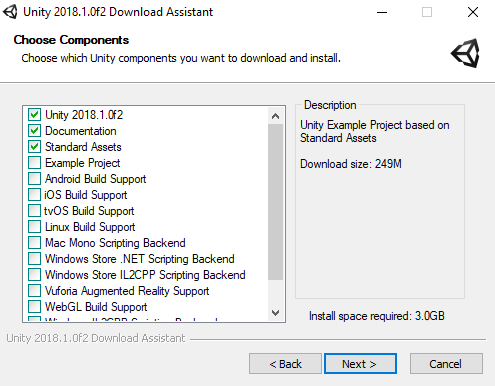
Click through the installer until you reach the following screen where you select components:
The screenshots in this tutorial are made on Windows, because that is what the majority of Unity developers use (mainly because Windows is a more popular gaming platform).
By default, you should select the Unity Engine, Documentation and Standard Assets. Here’s why they are significant:
-
Unity Engine: This is the powerhouse that will drive all of your games. When you update the engine, keep this — and only this — selected to avoid downloading unnecessary files.
Don’t worry if your version number is slightly different than what we’ve shown — Unity is constantly updating.
- Documentation: This is your lifeline when you run into issues you don’t understand. Downloading the documentation frees you from reliance on the internet. Having it on hand is particularly helpful when traveling or dealing with unstable networks.
- Standard Assets: These are additional objects that help you build games such as first-person and third-person character controllers, anti-aliasing and other useful items.
In that case, you just run the installer again, uncheck everything and then check the required platforms. Follow the installer to completion to install those components.
Run the program once installation completes. The first thing you’ll see is a dialog asking for your Unity credentials.
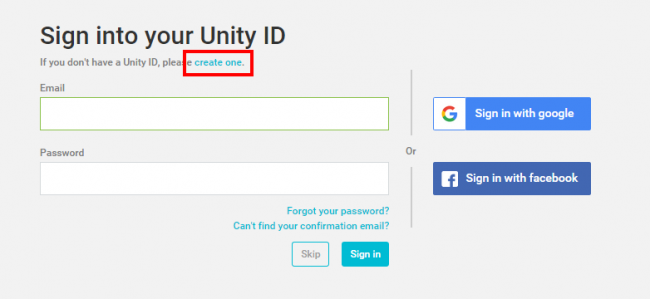
If you don’t have an account, click create one and follow the steps. Unity accounts are free. You’ll have to log in every time you fire it up, but the engine does have an offline mode for those times when you have no network.
Once you’re logged in, you’ll be presented with a project list that provides an easy place to access all of your projects.
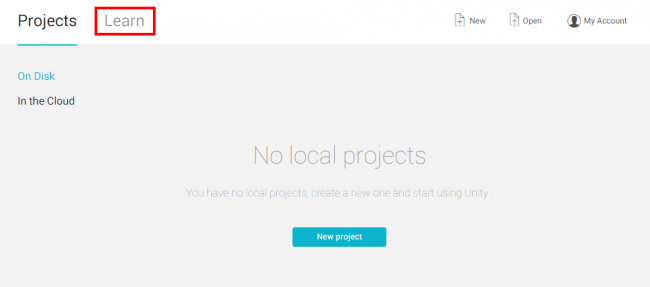
With Unity 2018, you now have a Learn tab. This tab provides a bunch of different Unity tutorials to get you up to speed with the editor.
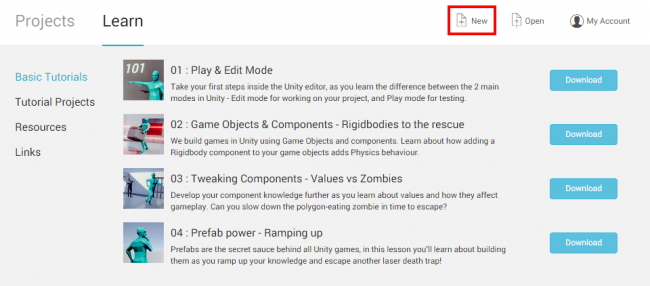
Definitely check them out when you are done with this tutorial. To get started, click the New button.
You should see the project creation dialog. You’ll notice that you have a few options, so fill them in as follows:
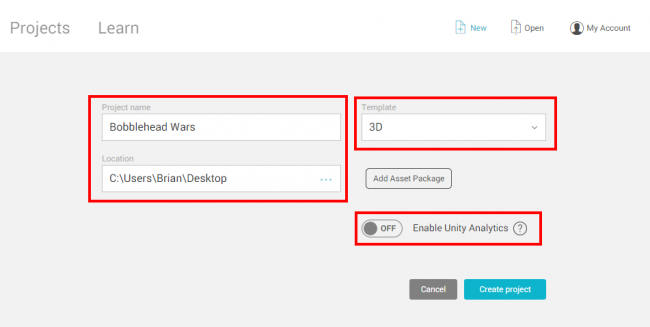
Here’s what everything on this screen means:
- The Project name represents the internal name of the game. It’s not published with your final game, so you can name your projects whatever you like. Give this one the name Bobblehead Wars.
- The Location field is where you’ll save the project and related items. Click the three dots in the Location field to choose a location on your computer.
- Unity 2018 comes with a new feature known as Templates. Unity used to only switch between 3D and 2D. It required the end user to turn on a bunch of settings to make simple games look good. Now, Unity provides different templates configured with the optimal settings. For instance, if you are developing a game for mobile devices, you would choose the Lightweight RP template. Templates don’t limit you in any way. They just save you time when configuring the editor and engine. For now, make sure 3D is selected.
- The Add Asset Package button allows you to include additional assets in your game or any others you download from the Unity Asset Store. You don’t need to do anything with this for now.
- Finally, you have the option to Enable Unity Analytics, which give you insight into your players’ experiences. By reading the data, you can determine areas wherein players struggle and make changes based on the feedback. This tutorial will not delve into analytics, so set the switch to off.
Once you’re ready, click the Create project button. Welcome to the world of Unity!
Learning the Interface
When your project loads, you’ll see a screen packed full of information. It’s perfectly normal to feel a little overwhelmed at first, but don’t worry — you’ll get comfortable with everything as you work through this tutorial.
Your layout will probably look like this:
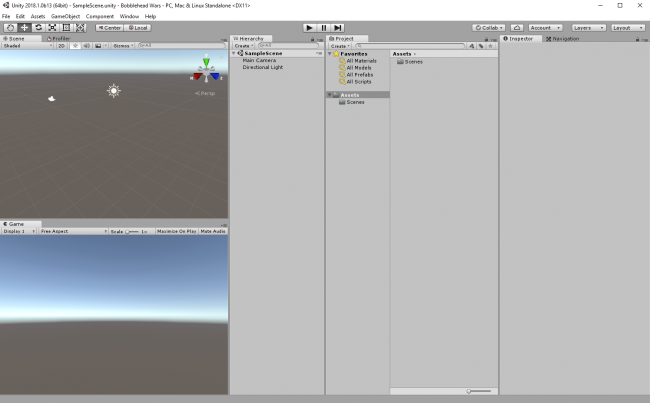
If not, click the Layout button in the top-right and select 2 by 3 from the dropdown menu.
Each layout is composed of several different views. A view is simply a panel of information that you use to manipulate the engine. For instance, there’s a view made for placing objects in your world. There’s another view for you to play the game.
Here’s what the interface looks like when broken down into individual views:
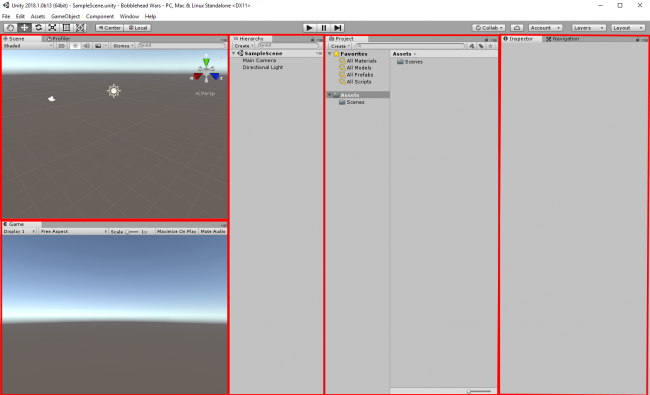
Each red rectangle outlines a view that has its own purpose, interface and ways that you interact with it.
To see a list of all views, click the Window option on the menu bar.
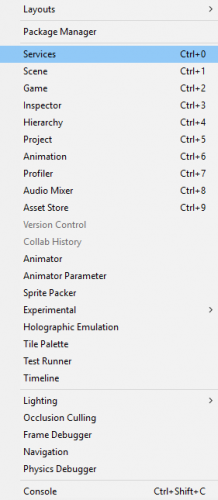
The Unity user interface is completely customizable so you can add, remove and rearrange views as you see fit.
When working with Unity, you’ll typically want to rearrange views into a Layout that’s ideal for a given task. Unity allows you to save layouts for future use.
In the Editor, look for the Game tab (the view to the lower left) and right-click it. From the drop-down menu, select Add Tab then choose Profiler.
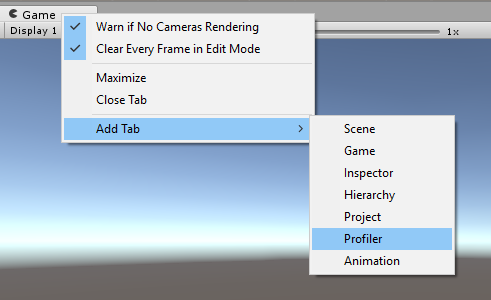
The Profiler view lets you analyze your game while it’s running. Unfortunately, the profiler is also blocking the Game view, so you won’t be able to play the game while you profile it — not so helpful.
Click and hold the Profiler tab and drag it to the Scene tab above.
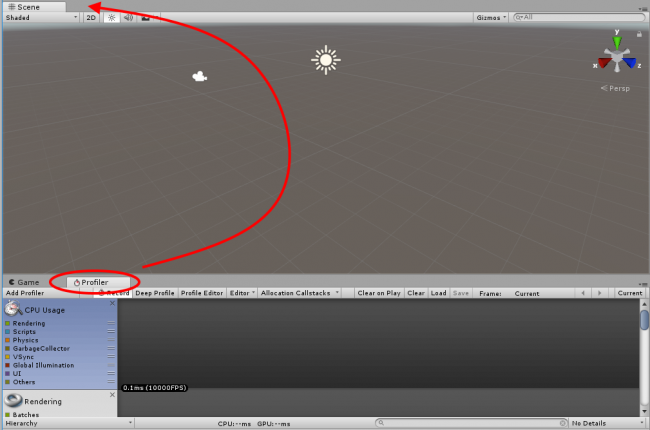
As you see, views can be moved, docked and arranged. They can also exist outside the Editor as floating windows.
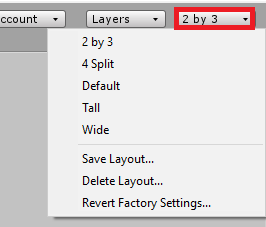
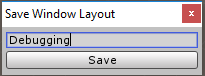
To save the layout, select Window\Layouts\Save Layout… and name it Debugging.
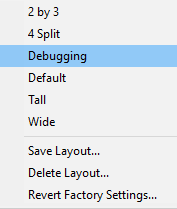
Whenever you need to access this particular layout, you can select the Layout button and choose Debugging.
![]()
When clicked, you’ll see a listing of all your views.
You can also delete layouts. If you ever accidentally trash a stock layout, you can restore the default layouts.
Organizing your Assets
Beginners to Unity might imagine that you develop your game from start to finish in Unity, including writing code, creating 3D models and textures, and so on.
In reality, a better way of thinking about Unity is as an integration tool. Typically, you will write code or create 3D models or textures in a separate program, and use Unity to wire everything together.
For Bobblehead Wars, we’ve created some 3D models for you, because learning how to model things in Blender would take an entire book on its own!
In this tutorial, you will learn how to import models into your game.
But before you do, it pays to be organized. In this game, you’re going to have a lot of assets, so it’s critical to organize them in way that makes them easy to find.
The view where you import and organize assets is called the Project Browser. It mimics the organization of your file system.

It previous versions of Unity, every Project Browser defaulted with nothing in it. With 2018, it now comes with a Scenes folder and a new scene called SampleScene. You can think of a scene as a level in your game. You can divide all your levels into individual scenes or you can keep everything in one scene. The choice is yours.
In the Project Browser, select the Assets folder and click the Create button. Select Folder from the drop-down menu and name it Models. This will be home to all your models. You may feel tempted to create folders and manipulate files in your file system instead of the Project Browser. That’s a bad idea — do not do that, Sam I Am!
Unity creates metadata for each asset. Creating, altering or deleting assets on the file system can break this metadata and your game.
Create the following folders: Animations, Materials, Prefabs, Presets, Scripts, and Textures.
Your Project Browser should look like this:
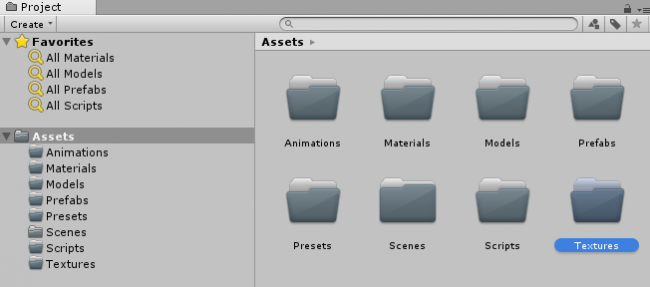
Personally, I find large folder icons to be distracting. If you also have a preference, you can increase or decrease the size by using the slider at the bottom of the Project Browser.
![]()
Finally, you may want to change the name of an asset. For instance, your current scene is called SampleScene. Select the Scenes folder, and then select SampleScene file. The name will become highlighted. Single click it one more time and you’ll be to write a new name. Change it to Main.
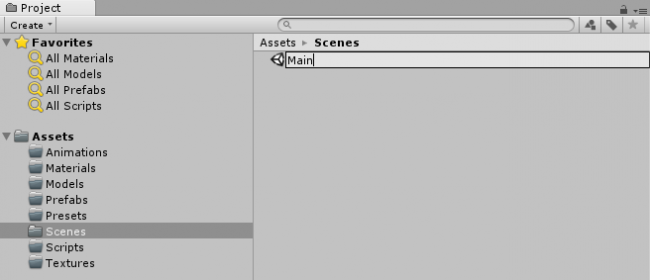
You can do this to any folder or asset in the Project Browser.
Importing Assets
Now that you’ve organized your folders, you’re ready to import the assets for the game. First, you’ll import the star of the show: the space marine.
Download the materials for this tutorial, open the resources folder and look for three files:
- BobbleMarine-Head.fbx
- BobbleMarine-Body.fbx
- Bobble Wars Marine texture.psd
Drag these three files into the Models folder. Don’t copy BobbleWars.unitypackage; that comes later.
Select the Models folder and you’ll see that you have a bunch of new files. Unity imported and configured the models for you.
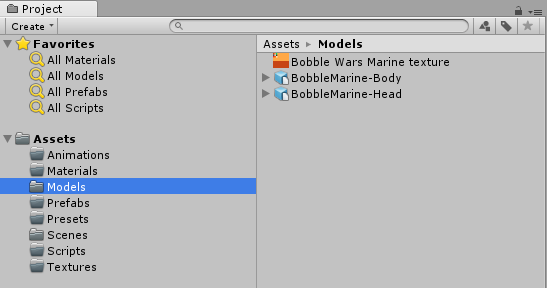
To keep things tidy, move Bobble Wars Marine texture from the Models folder to the Textures folder. Textures are the basis of Materials.
What are materials, you ask? Materials provide your models with color and texture based upon lighting conditions. Materials use what are known as shaders that ultimately determine what appears on screen. Shaders are small programs written in a specific shader language which is far beyond the scope of this tutorial. You can learn more about materials through Unity’s included documentation.
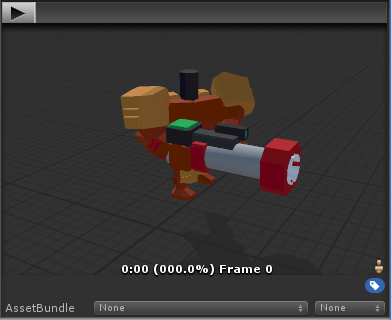
Switch back to the Models folder and select BobbleMarine-Body. The Inspector view will now display information specific to that model, as well as a preview.
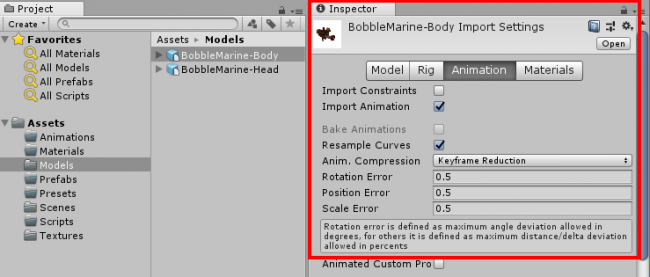
If you see no preview, then its window is closed. At the bottom of the Inspector, find a gray bar then drag it upwards with your mouse to expand the preview.
The Inspector allows you to make changes to the model’s configuration, and it allows changes to any selected object’s properties. Since objects can be vastly different from one another, the Inspector will change context based on the object selected.
Installing Blender
At this point, you’ve imported the models and texture for the space marine. The models were in FBX format, and the texture was in .PSD format.
We supplied the space marine models to you in the .FBX format, as this is a popular format for artists to deliver assets. But there’s another popular format you should understand how to use as well: Blender files.
Unlike .FBX, Blender files contain the source model data. This means you can actually edit these files inside Blender, and the changes will immediately take effect in Unity, unlike an .FBX file.
With an .FBX, you’d need to export and re-import the model into Unity every time you changed it.
There is a small tradeoff for all this delicious functionality. For Unity to work with Blender files, you need Blender installed on your computer. Blender is free, and you’ll be happy to know that you’ll use it to make your own models in the book.
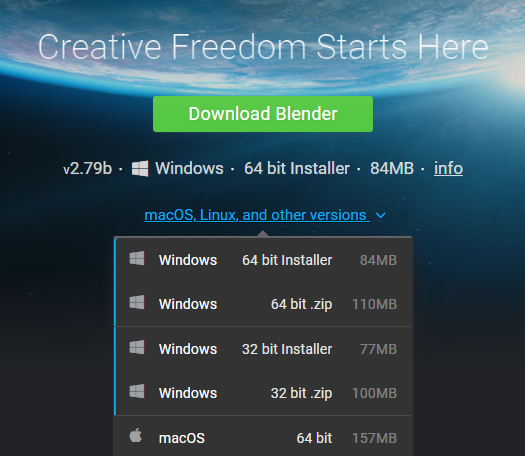
Download and install Blender at the following URL: https://www.blender.org/download/
After you install Blender, run the app and then quit. That’s it — you can now use Blender files with Unity.
Importing Packages
Now that you’ve installed Blender, you can now import the rest of the assets.
The rest of the assets are combined into a single bundle called a Unity package. This is a common way that artists deliver assets for Unity, especially when they purchase them from the Unity store.
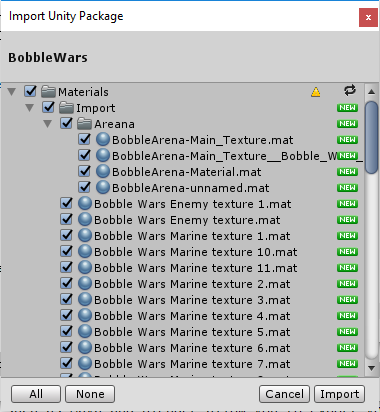
Let’s try importing a package. Select Assets\Import Package\Custom Package…, navigate to your resources folder and select BobbleheadWars.unitypackage, then click Open.
You’ll be presented with a list of assets included in that package, all of which are selected by default. Note that some of these are Blender files, but there are also other files like textures and sounds as well. Click the Import button to import them into Unity.
The import will add a bunch of additional assets to your project. If you get a warning, just dismiss it.
To keep things tidy, single-click the newly generated Materials folder (in the Models folder) and rename it to Models. Drag this new folder into the parent-level Materials folder.
Adding Models to the Scene View
At this point, you have imported everything into Unity. It’s time to start putting your game together, and you’ll kick it off by adding your models to the Scene view.
The Scene view is where game creation happens. It’s a 3D window wherein you’ll place, move, scale and rotate objects.
First, make sure to select the Scene view tab. Then, in the Project Browser, select BobbleArena from the Models subfolder and drag it into the Scene view.
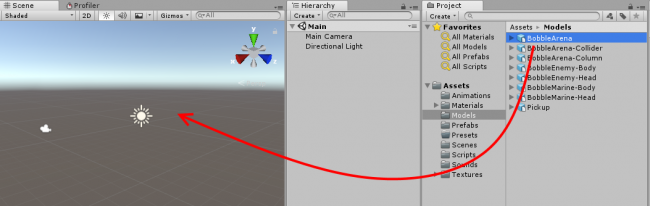
Check out the arena in the Scene view:
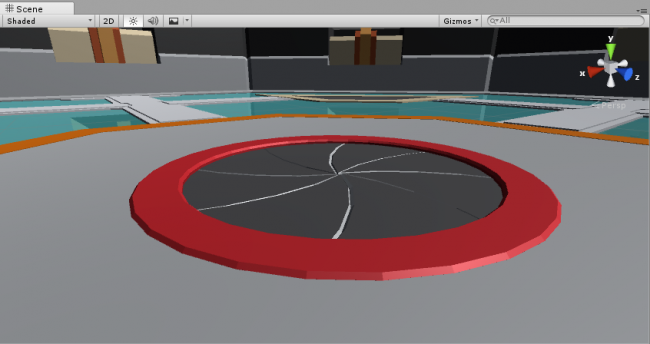
Pretty cool, eh?
The Scene view gives you a way to navigate your game in 3D space:
- Right-click and rotate your mouse to look around.
- Hold down the right mouse button and use the WASD keys to actually move through the scene.
- Moving too slow? Give it some juice by holding down the Shift key.
- Scroll with your mouse wheel to zoom.
- Press your mouse wheel and move your mouse to pan.
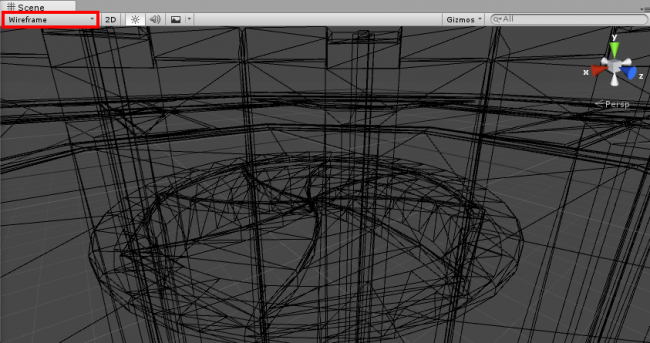
By default, the view displays everything with textures in a shaded mode. You can switch to other viewing modes such as wireframes or shaded wireframe.
Let’s try this out. Just underneath the Scene tab, click the Shaded dropdown and select Wireframe. Now you’ll see all your meshes without any textures, which is useful when you’re placing meshes by eye.
Switch the Scene view back to Shaded textures.
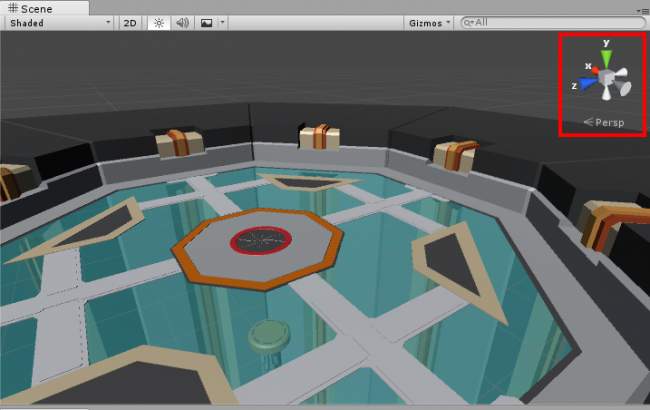
In the Scene view, you’ll notice a gizmo in the right-hand corner with the word Persp underneath it. This means the Scene view is in perspective mode; objects that are closer to you appear larger than those that are farther away.
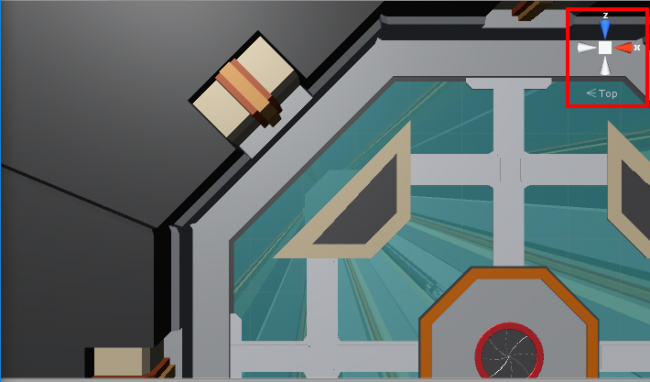
Clicking on a colored axis will change your perspective of the scene. For example, click the green axis and the Scene view will look down from the y-axis. In this case, the Persp will read Top because you’re looking at the world from that perspective.
How’s it feel to be on top of the world? :]
Clicking the center box will switch the view into Isometric mode a.k.a., Orthographic mode. Essentially, objects are the same size regardless of their proximity to you.
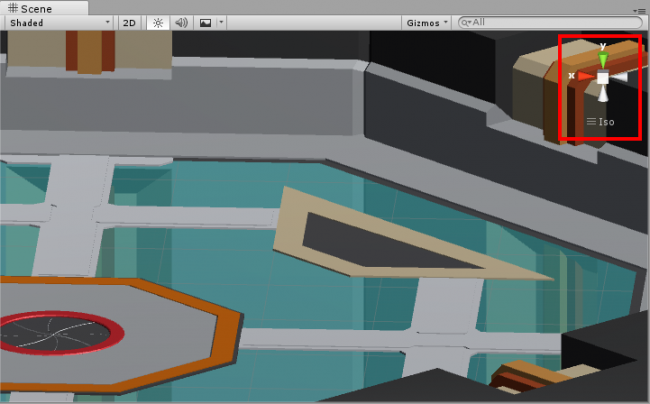
To return to Perspective mode, simply click the center box again.
Adding the Hero
At this point, you have the arena set up, but it’s missing the guest of honor!
To fix this, in the Project Browser, find and open the Models folder then drag BobbleMarine-Body into the Hierarchy view.
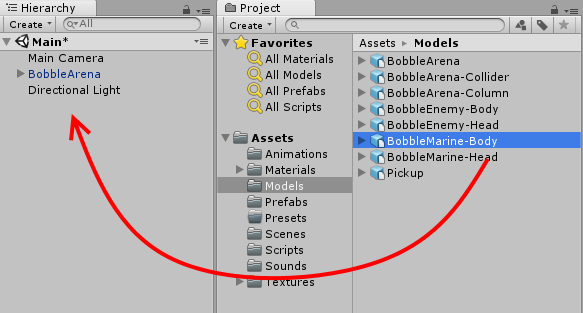
In Unity, games are organized by scenes. For now, you can think of a scene as a level of your game. The Hierarchy view is a list of all objects that are currently present in the scene.
Note that your scene already contains several objects. At this point, it contains your arena, the space marine, and two default objects: The main camera and a directional light.
With the marine body still selected, hover the mouse over the Scene view and press the F key to zoom to the marine. This shortcut is useful when you have many objects in your scene and you need to quickly get to one of them.
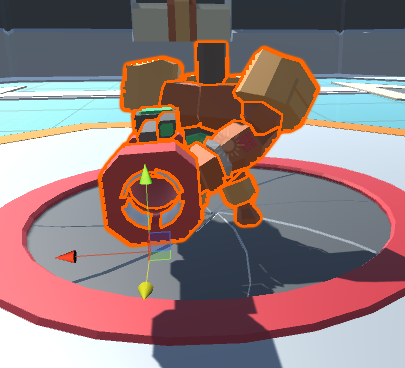
Don’t worry if your space marine isn’t placed at this exact position. You’ll fix that later.
You’ll notice that when an object is selected, an outline appears around that object. Unity occasionally changes the outline color for selected objects from version to version.
In Unity 2018, new projects have a red outline. This is due to the new default color space of the editor. The color space determines how the engine mixes colors. It also determines what devices and platforms that your game can support. By default, the color space is set to Gamma but you can switch it to Linear for new PCs, mobile devices, and current consoles (PS4, Xbox One, and the Nintendo Switch).
For now, it’s best to use the default color settings, but you can easily switch from red to orange. You can always change the color by selecting Edit\Preferences on Windows or Command-, on macOS. From the Preference window, select Colors and you’ll see a listing of all the colors that you can customize. To change the selection color, you need to alter the Selection Outline field.
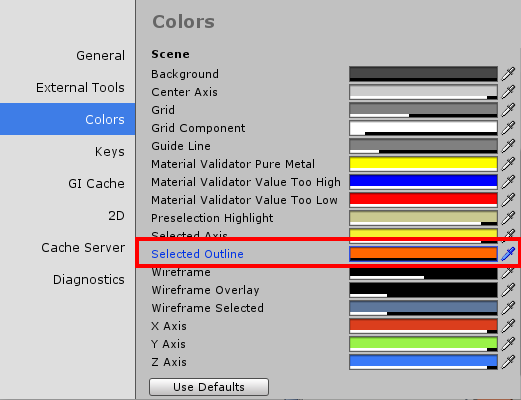
The key point is that the selection color is cosmetic, not functional. Throughout this tutorial, we use an orange selection color.
While the space marine’s dismembered body is pretty intimidating, he’s going to have a hard time seeing and bobbling without a head!
Drag the BobbleMarine-Head from the Project Browser into the Hierarchy. Chances are, the head will not go exactly where you’d hope.
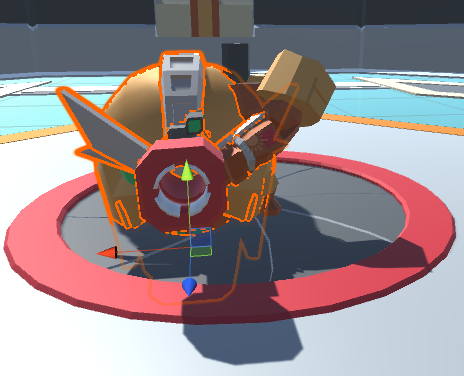
Select the head in the Hierarchy to see its navigation gizmos. By selecting and dragging the colored arrows, you can move the head in various directions.
The colored faces of the cube in the middle of the head allow you to move the object along two axes at the same time. For example, selecting and dragging the red face — the x-axis — allows you to move the head along the y- and z-axes.
You can use the toolbar to make other adjustments to an object.
The first item is the hand tool. This allows you to pan the Scene and is equivalent to holding down the middle mouse button.
![]()
Select the position tool to see the position gizmo that lets you reposition the selected object.
![]()
Use the rotate tool to rotate the selected object.
![]()
The scale tool allows you to increase and decrease the size of an object.
![]()
The rect tool lets you rotate, scale and reposition sprites. You’ll use this when working with the user interface and Unity 2D.
![]()
The transform tool, new to Unity 2018, combines the move, rotate, and scale tool into one swiss army knife. This tool is your one stop shop for providing all your object transformations.
![]()
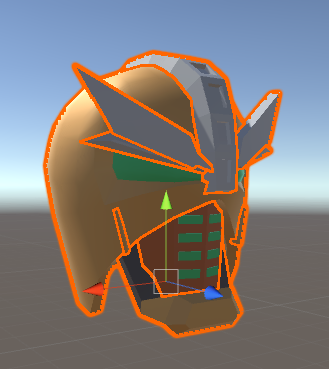
Using the aforementioned tools, tweak the position of the helmet so that it sits on the hero’s neck. Also, see if you can move the space marine so he’s centered in the arena. In the next tutorial in this series, you’ll position these precisely with the Inspector. When done, the marine should look like this:
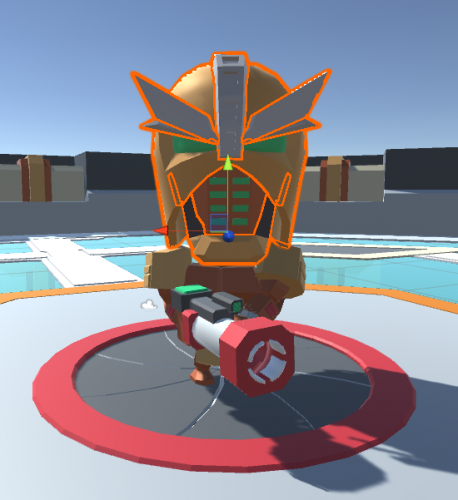
After positioning the space marine’s head, select File\Save Scene as…. Unity will present you with a save dialog. Name the scene Main, and after you finish creating it drag the file to the Scenes folder.
Where to Go From Here?
Congratulations! You now have a space marine at the ready to kill all the alien monsters, and you’ve learned a lot about the Unity user interface and importing assets along the way.
Specifically, in this tutorial you’ve learned:
- How to configure the Unity layout, including customizing it for specific tasks.
- How to import assets and organize them within Unity.
- How to add assets to a scene and position them manually.
In the upcoming second tutorial of this series, the aliens will finally catch up with the space marine — and you’ll learn about GameObjects and Prefabs along the way!
If you’re enjoying this tutorial series and want to learn more, you should definitely check out Unity Games by Tutorials.
The book teaches you everything you need to know about building games in Unity, whether you’re a beginner or a more experienced game developer. In the book, you’ll build four great games:
- A 3D twin-stick shooter
- A classic 2D platformer
- A 3D tower-defense game (with virtual reality mode!)
- A first-person shooter
Check out the trailer for the book here:
If you have questions or comments on this tutorial, please leave them in the discussion below!


Comments