Introduction to Unity: Getting Started – Part 2/2
In this second part of the Introduction to Unity tutorial you’ll learn: “How to use the Project window to import and organize your assets”, “The difference between GameObjects and Prefabs”, “How physics work in Unity”, “How cameras work and which types of projections are available” and “The basics of Materials in Unity”.


Update: This tutorial was updated to Unity 5.5 by Mark Placzek. Original post by Brian Moakley.
![]()
In Part 1 of this Introduction to Unity tutorial series, you learned the ins-and-outs of the Unity interface. In this second part, you’ll work in the Unity interface as you create your first game, a small space shooter. Along the way, you’ll learn the following:
- How to use the Project window to import and organize your assets.
- The difference between GameObjects and Prefabs.
- How physics work in Unity.
- How cameras work and which types of projections are available.
- The basics of materials in Unity.
This tutorial will give you an overview of Unity’s various systems. You’ll be assembling a game from all the pre-created assets, while in subsequent tutorials, you’ll learn about Unity’s subsystems in depth while you create your own assets and write your own scripts. When you are finished the result will look like this:
There’s a lot to cover, so put your phone on airplane mode, lock the doors, and open your mind to the world of Unity!
Getting Started
Download the sample files for this tutorial; they contain three folders: game assets, models and the starter project. You can simply use the project that you worked on in the first part of the tutorial, or you can open the project from the folder starter project in Unity using File\Open Project and then selecting the Space Debris project folder.

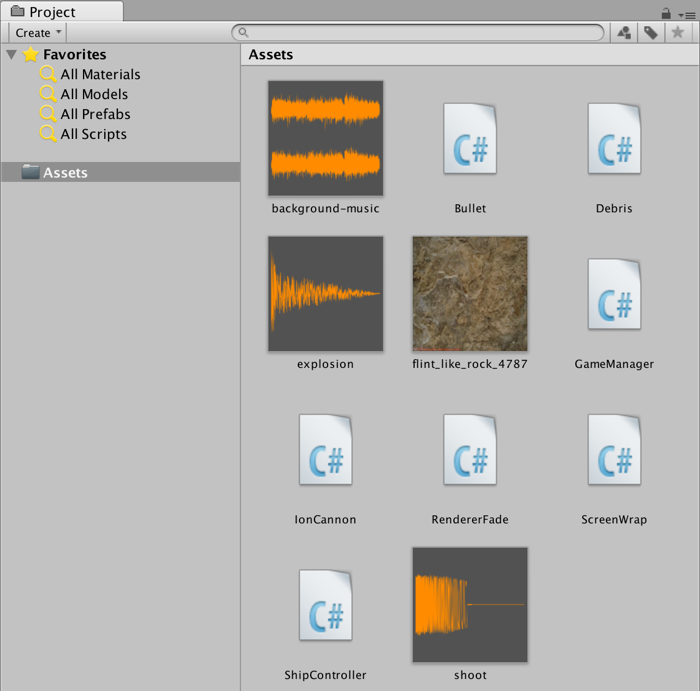
In your file system navigate to the game assets folder from the collection of sample files, select all files in that folder, and drag them onto the Assets folder in the Project window in Unity:

When Unity’s finished importing the files, your Project window will look like the following:
Unity defaults to large thumbnails, but if you prefer to work with lists instead, you can change it like this: at the bottom of the Project window, move the slider to the left to shrink the assets thumbnails.

While it’s nice to have all your assets in one place, they’re not organized too well – or at all! It doesn’t seem like a big problem when you first start a project, but as your project expands, so will your collection of assets.
By organizing your assets up front, you’ll spend less time searching for your assets and more time actually building your game.
Your next step is to organize your assets into folders. In the Project window, click the Create button and select Folder from the list of options:

Name the new folder Materials. Your Project window should now look something like the following:

Now create the following five folders to hold the rest of your assets:
- Models
- Prefabs
- Scripts
- Sounds
- Textures
Folders in Unity behave much like the ones on your computer. You can create subfolders and drag folders into and out of other folders. The underlying filesystem will match the organization in Unity, which makes it easy for you to find your assets outside of Unity.
Now, it’s time to get organized! Select the Bullet, Debris, GameManager, IonCannon, RendererFade, ScreenWrap and ShipController scripts and drag them into the Script folder.
Next, select the background-music, explosion and shoot sound files and drag them into the Sounds folder.
Finally, select the flint_like_rock_4787 texture and move it into the Textures folder.
Your Project window should now look like the following:

At this point, you’re probably eager to start making your game. But before you get too far, you need to get into the habit of saving your work since Unity doesn’t offer an autosave feature. If Unity crashed or you lost your power, you’d lose everything except your project organization.
Unity saves your work in scenes. A scene can be one level of many in a game, or it could be the only “level” in the entire game. In this game, you’ll use just one scene for everything.
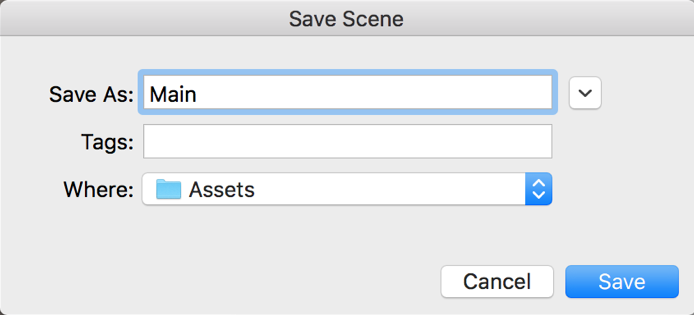
Click Command-S to save your game. A save dialog will open; name your scene Main like so:
Working with GameObjects and Prefabs in Unity
What’s a game without a player? Look inside models\player folder from the sample files you downloaded earlier; you’ll see an FBX file along with a few image files.
An FBX file contains all the data required to create a 3D model along with other things such as animations. The player file you’ll use in this Unity tutorial was created by ComboMash for his game Hextraction.
Select all the files in the player folder and drag them on top of the Assets folder in your Project window. You’ll see the following dialog:

Some image files convey extra information for Unity, but are saved as a standard image format. In this case, p_pod_normal.jpg defines the depths of a surface, which provides surface lighting information without the need to create additional geometry. This is called a normal map.
However, Unity thinks it’s dealing with a regular image. Click Fix Now to instruct Unity to treat this file as a regular normal map.
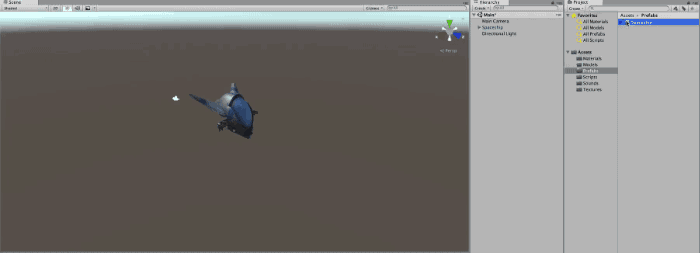
Once you’ve imported the player files, drag the hextraction_pod asset from the Project window into the Scene view as follows:

Cool – you’ve created your first instance of a model. Unity correctly imported the textures and applied them to the model.
You’ll also notice the Hierarchy now lists the new GameObject:

As noted in Part 1 of this tutorial series, everything in your Hierarchy will be a type of GameObject. A GameObject by itself contains what’s known as a transform, which has information about the position, scale, and rotation of the GameObject:

You customize GameObjects by adding Components to them; you can think of components as representing the behavior and appearance of the GameObject.
For instance, you can add a lighting component to illuminate your GameObject. You can add an Audio Source to make your GameObject emit sound, or even write your own components as scripts and attach them to GameObjects.
GameObjects can also act as containers. Hold down the Alt key and click on the disclosure triangle to the left of hextraction_pod in the Hierarchy. This will expand the GameObject and all levels below it. You’ll see the following collection of GameObjects:
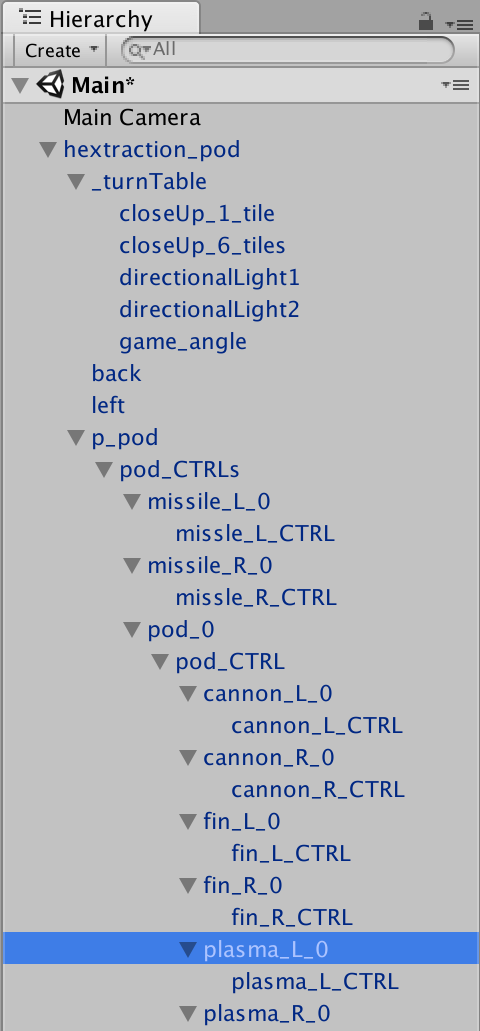
A lot of these are empty GameObjects that represent the structure of a model. Unity creates these GameObjects when you import a model. Other GameObjects, such as the children of pod_mesh, contain components such Skinned Mesh Renderers to display geometry on the screen.
You’ll notice that some GameObjects in the Hierarchy are labelled in black, while others are labelled in blue:
The black color means it is a standard GameObject. The blue text tells you the GameObject is connected to other objects with a Prefab. Sometimes GameObjects also turn brown. This means they have lost the prefab connection.
Prefabs let you save GameObjects to be easily duplicated either using code or through dragging new instances into the Scene view. It is a bit like using sand forms. Except, the instances of the Prefab are all connected. When you change the prefab, the instances will change as well.
Once you have an instance of a Prefab in the Scene view, you can customize it as you like. There may be times when you want to push these changes to existing Prefabs (because you liked them) or reset the instance to the state of the original prefab (because you messed up).
Select hextraction_pod in the Hierarchy. In the Inspector window you’ll see three buttons: Select, Revert, and Open:

Select locates the Prefab in your Project window. This is particularly useful when you misplace your Prefab in a complicated folder structure within your Project window. Try it now to see what happens.
When you make changes to a Prefab, you’ll see an Apply button in place of Select. Apply lets you push your changes to all other instances of that Prefab. The Revert button reverses any changes made to an instance of Prefab to the state of the original Prefab. Finally, Open opens the model file in the program that generated it, such as Maya or Blender.
Currently, the player’s ship has a tiled grid underneath it, which looks a bit strange. Select the tile_reference GameObject from the Hierarchy; it’s a direct child of the hextraction_pod GameObject.

With tile_reference selected in the Hierarchy, delete the grid by pressing Cmd ( or CTRL)-Delete. Unity will present you with the following warning:
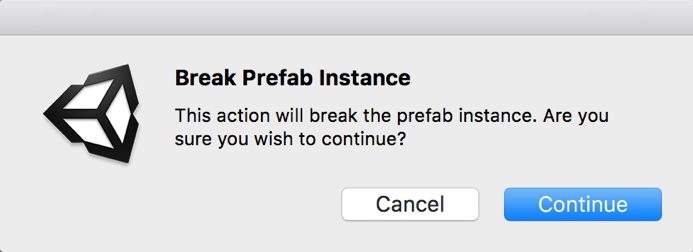
Unity is warning you that such a major change will break the connection to the prefab. Since you’re sure you want to do this, click Continue. You’ll note that hextraction_pod is labelled in black text, indicating it’s reverted to a plain old GameObject:

Next, right click on hextraction_pod in Hierarchy window, select Rename from the drop down menu that appears, and rename the GameObject to Spaceship.
Now drag Spaceship into the the Prefabs folder of the Project window:
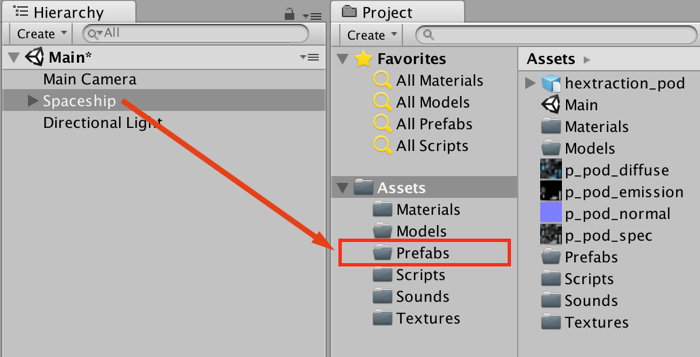
Dragging a GameObject into the Project window converts it into a prefab without any extra effort on your part. You could create as many instances of the Spaceship by dragging them from the Project window and into the Scene view. Currently this only copies the model, but later it could contain script, audio setting, and much more. So you can already see, that Prefabs can be really helpful.
Go forth my unstoppable army of spaceships! Muhahahah!
Finally, take a moment to keep the Project window organized: click on the Assets folder to display its contents. Then drag the hextraction_pod into the Models folder and the p_pod_ files into the Textures folder.
Don’t forget to save your work.
Controlling the Camera
A spaceship isn’t really useful if it can’t move. In this section, you’ll give the player control of the spaceship. To do that, you’ll need to deal with two things: the camera and the physics system. Don’t worry, you won’t need to deal with subatomic particle physics today! :]
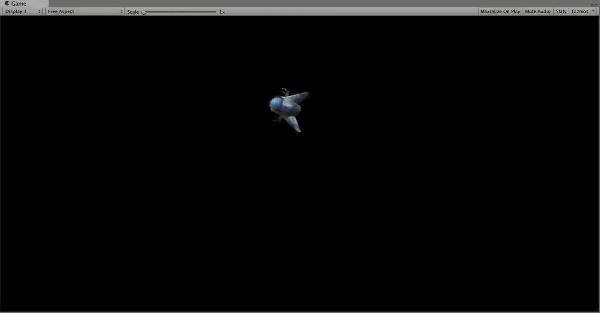
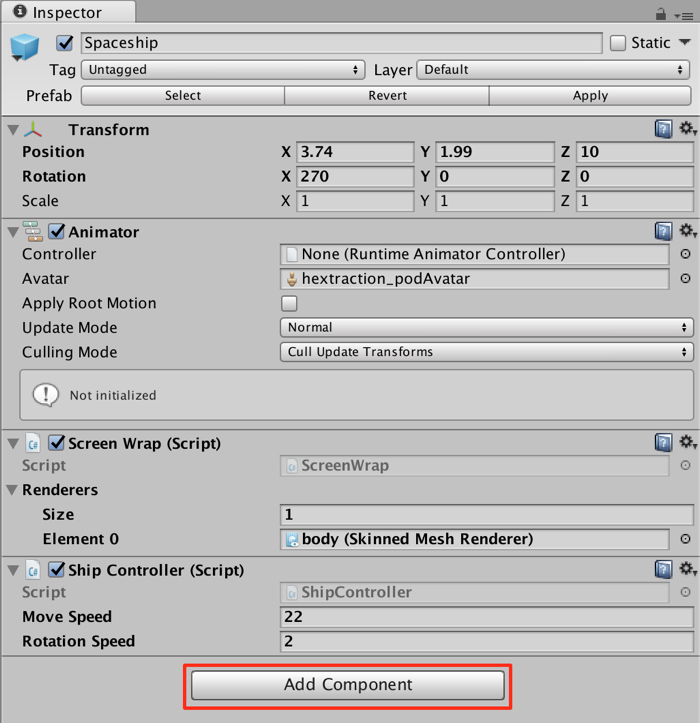
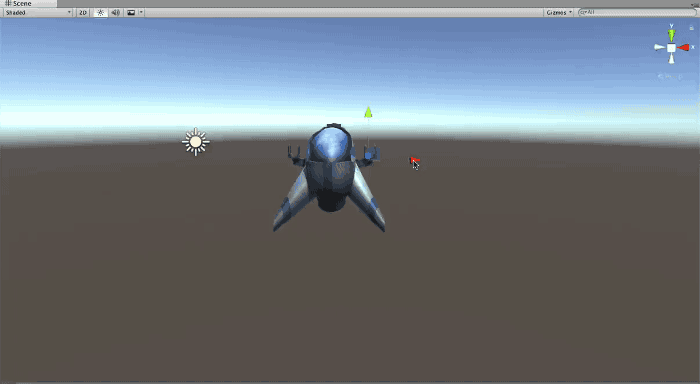
First, you need to set up the ship. Select the Spaceship in the Hierarchy window, then use the Inspector window to set its position to X = 3.74, Y = 1.99 and Z = 10. Then set the rotation to X = 270, Y = 0 and Z = 0 so that the values in the Inspector window match the ones shown below:
![]()
Looking at the Game view, you can see that the ship is still a little too close to the camera:
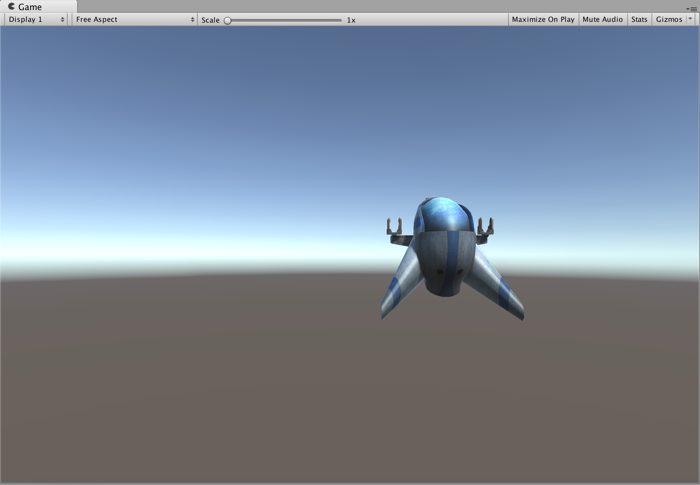
There are two ways to fix this: you can either move the ship further back, or you can configure the camera. Prepare to become a camera assistant! :]
Select the Main Camera in the Hierarchy; you’ll see a Camera component in the Inspector. There are a ton of options here, but for now ignore everything except Projection and Field of View:
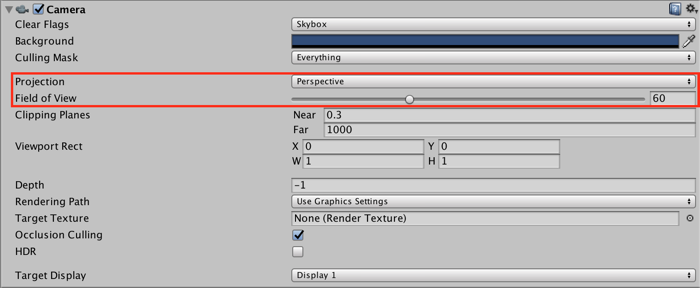
You can choose Perspective or Orthographic for your projection field; this choice determines the ultimate appearance of the game. Perspective projection behaves very much like your eye does; the closer an object is to your eye, the larger it appears. Orthographic projections discard depth information; objects closer to you, or in this case, the camera, will appear the same size as objects farther away:
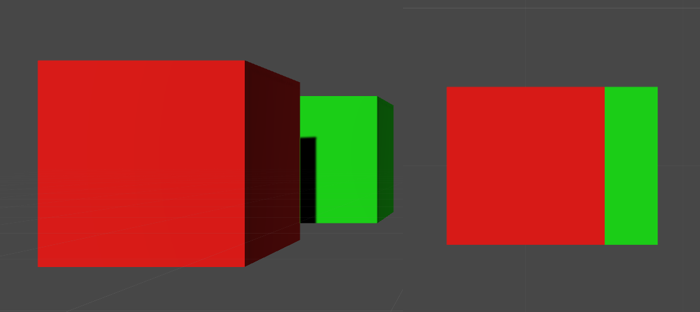
The two cubes in the left are being shown with Perspective projection while the cubes on the right are Orthographic.
Generally speaking, 3D games should use a Perspective projection. Games without depth, like 2D games, should use Orthographic projection.
While your game has 3D elements, the gameplay is essentially 2D. In the Projection field, select Orthographic. Next, set the size to 18.85. Your Game view should look like the following:

A spaceship should fly, shouldn’t it? To do this, you’d have to write some code in C# or UnityScript to move the ship frame-by-frame. To save you some work, the example files contain a script all ready to use. The question is, how do you add it to your ship?
A script is simply another type of component, and there are lots of ways to add components to GameObjects. You’ll experiment with a few methods in this tutorial.
For now, select Spaceship from the Hierarchy. Then select the Component option from the menu bar. At the bottom, you’ll see an option called Scripts with a flyout menu of available scripts. Select the Ship Controller script:

You should now see that the Ship Controller script has been added as a Script component to the Spaceship GameObject in the Inspector window.
Just as you can with other components, you can define fields in your scripts that you can access in the editor. This gives you the ability to change properties of your scripts while your game is being played:

Set Move Speed of your script to 22 and Rotation Speed to 2. The move speed determines the speed of the ship, while the rotation speed determines how quickly the ship can turn. Hit the Play button in the top middle of the Unity interface. This starts the game. Use the arrow keys to move your ship.
Unfortunately, your ship will fly off the screen, to Alpha Centauri and beyond. You’ll need to fix that.
Use the menu bar as before to add the ScreenWrap script to the spaceship:

You’ll notice that this script has a field named Renderers, which takes an array of Skinned Mesh Renderers, that is, the geometry that creates a model. If a renderer isn’t onscreen, then it teleports the GameObject to another position on screen based on its movement direction and current position.
Expand the Spaceship node until you find the body GameObject, then drag body GameObject into the Renderers field:

Now run your game. To infinity… and beyond! :]

Did you remember to save your work?
Introducing Physics
There’s just one major problem. In flying your ship around, you violated one of the laws of physics. No, not Newton’s laws of physics – the laws of Unity physics best-practices.
Unity uses physics for collision detection; if a GameObject does not have a RigidBody component it is considered a static colliders. This means Unity assumes that it will stand still, which allows for huge optimizations when it comes to collision detection. But! When you start moving those static objects around anyway, Unity has to recalculate those optimizations, which adds unnecessary CPU time to your game.
To avoid this unnecessary CPU overhead, you’ll need to opt-into the physics engine by adding a Rigidbody component. You’ve already added components directly from the menu bar; this time, with the Spaceship still selected in the Hierarchy, click the Add Component button in the Inspector:
You’ll see a component menu appear; click Physics then Rigidbody:

This component also has a lot of options. Is Kinematic is the one you’re interested in. Setting this option means that you want to move a GameObject manually but still want the object to register for collisions. This is useful when you’re moving items via scripts, like you’re doing here, or via animation.
Tick the Is Kinematic checkbox; since you aren’t using gravity in this game, uncheck the Use Gravity checkbox like so:

The object of this game is to fly around and shoot various types of debris. Naturally, handling collisions will play a large role in this type of game. You’ll need to know when the player shoots an asteroid or when a player crashes into something.
Colliders let you listen to and respond to collisions. There are many types of colliders to use with basic shapes, such as Sphere Collider and Box Collider. There’s even a mesh collider that is based on a 3D model. Colliders are displayed in the Scene view using green lines

If you are using a retina display the green lines are extremely thin! Unity is looking into customisability or making the editor dpi sensitive to improve this.
In this tutorial, you’ll keep things simple and use a Sphere Collider.
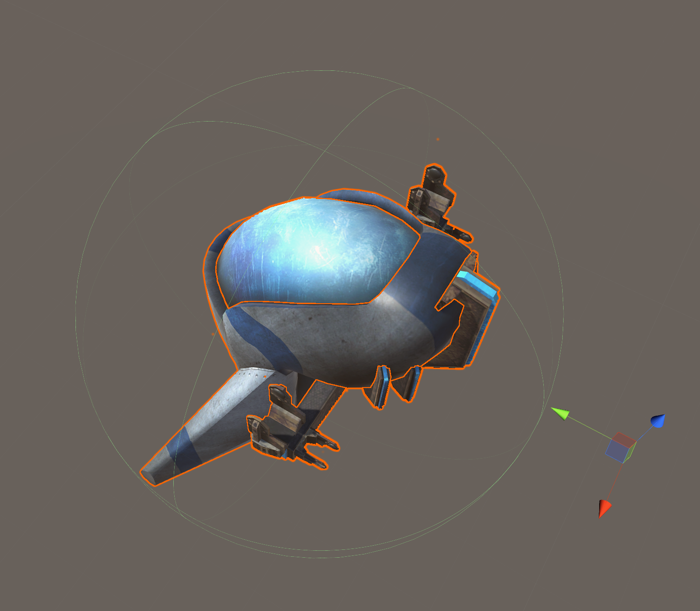
Select the Spaceship in the Hierarchy window and click the Add Component button in the Inspector window. Click Physics\Sphere Collider, and you’ll see a green circle behind the Spaceship:

Uh, wait – why is the collider behind the Spaceship? That’s because the actual model of the Spaceship has been offset from the parent when you changed its position earlier.
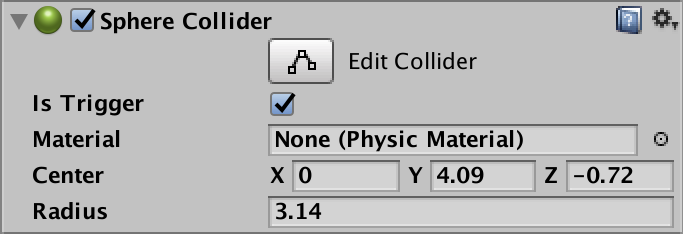
With the Spaceship selected in the Hierarchy, find your Sphere Collider in the Inspector. Set Center to X = 0, Y = 4.09 and Z = -0.72 then set the Radius to 3.14. Finally, check the Is Trigger checkbox. Kinematic GameObjects can’t register normal collisions, but they can listen to trigger events from other kinematic objects.
Your Sphere Collider component should look like the following:
The collider should also enclose the Spaceship, like so:
Arming the Cannons
While flying around is fun and all, most players have an overarching desire to fire off a few dozen photon torpedos! :] A script’s been provided for you to help satisfy that craving.
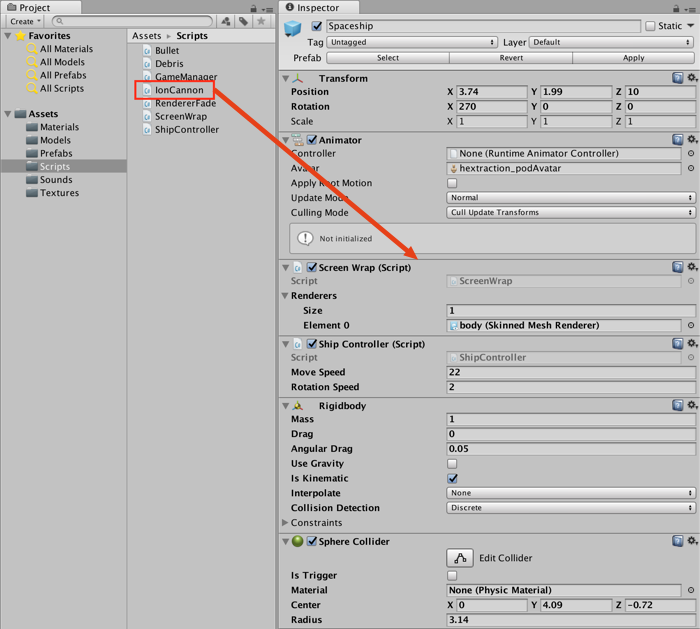
Select the Spaceship in the Hierarchy, open the Assets/Scripts folder in the
You’ll notice an Audio Source component was automatically added to the GameObject as well as the script. Some scripts require components; if the components aren’t found on the GameObject, they’ll be added automatically.
To make your objects play sounds, you need both an Audio Source and an Audio Clip. An Audio Source can be attached to any GameObject, while an Audio Clip is simply an audio file.
Drag the shoot sound from the Sounds folder in the Project window into the Fire Sound field:

You’ll notice that the Ion Cannon script has a Bullet field. Your job is to create a bullet object. Don’t worry if you’re not an artist – a simple sphere will suffice.
Click the Create button in the Hierarchy. From the menu, select 3D Object, then Sphere:

Select the Sphere in the Hierarchy, then use the Inspector to set scale to (.47,.47,.47). Select the Sphere in the Hierarchy and name it Bullet.
Since your bullet is going to be moving across the scene, it needs to opt-into the physics engine as well. Do you remember what you need to do? Give it a whirl and if you’re stuck, check the spoiler below.
[spoiler]Select the Bullet from the Hierarchy and click the Add Component button in the Inspector. Select Physics\Rigidbody to add the Rigidbody component.[/spoiler]
The bullet will need velocity to move, so make sure Is Kinematic is unchecked. Also, make sure Use Gravity is also unchecked.
The bullet will keep traveling even after it flies offscreen, just like your spaceship did originally. Drag the Bullet script from the Project window onto the Bullet GameObject. Now, when the bullet flies offscreen, it will automatically be destroyed.
Finally, drag your Bullet object into the Prefab folder of your Project window. This creates a Prefab of the bullet, which allows you to create lots of bullets using a script. Pew, pew :]
Now that you have your bullet created as a Prefab, delete the instance of the bullet from the Hierarchy.
Select your Spaceship again, and use the Inspector to add the Bullet Prefab to the Bullet field. The Inspector should look like so:

Finally, the sky background is somewhat out of place. You’d expect a spaceship to fly in the black void of space, wouldn’t you? :]
Select Main Camera in the Hierarchy and use the Inspector to set Clear Flags to Solid Color and Background Color to black:

Save your work, run your game and press the space bar to blast away with the Ion cannon!

Putting the Debris in Space Debris
So far you have a ship that can fire, but it would be far more interesting if there were something to shoot at. It’s time for you to add some asteroids to the mix.
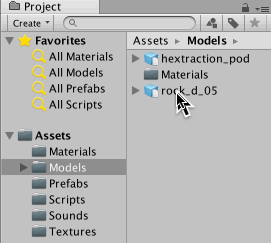
Find the rock_d_05.obj file in your downloaded files and drag it into the Models folder in the Project window.
Double-click rock_d_05.obj and rename it Asteroid.
This file only contains information about the model itself; it doesn’t have any animations included.
Drag the Asteroid model into the Scene view to create an instance of it. You’ll see that the asteroid is currently plain white:
![A cute couple? I'll give them a week! It looks like it could be a rocky relationship :]](https://koenig-media.raywenderlich.com/uploads/2016/12/Asteroid.png)
A cute couple? I’ll give them a week! It looks like it could be a rocky relationship :]
While you could make the argument that it’s a fragment of a snow-white comet, you should learn how to texture your models… unless you want to make a career of creating snow-themed games. :]
Expand the Asteroid GameObject and select its child object named rockLP001. In Inspector you’ll see it this child GameObject has a Mesh Renderer component attached to it. The renderer draws the object to the screen but needs a bit of help to do this – that’s where Materials come into play.
Materials determine the appearance of your objects. For example, a cotton shirt will look much different than a plaster wall would.
Unity achieves this by encapsulating a shader with each material. What’s a shader, you ask? It’s a simple program written in a C-like language that runs on the GPU. A shader can be simple enough to render a texture on a cube, or it can be complex enough to simulate water.
Unity provides many different shaders out of the box, for example to render a sky box, or make an object appear translucent.
Open the Materials folder in the Project window, and click the Create button. From the dropdown, select Material and give it the name Asteroid. In the Inspector window you’ll now see the available properties for a material.
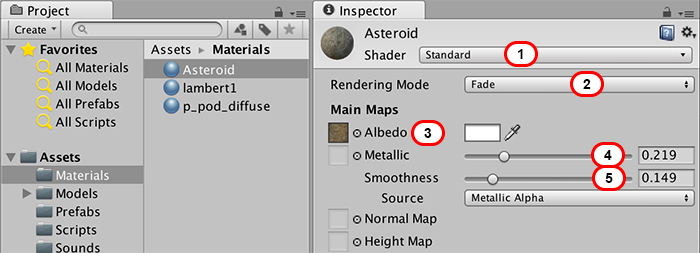
- The Shader option lets you choose from one of the many pre-packaged shaders. The default Standard Shader has enormous flexibility, so leave it selected.
- When an asteroid is hit, you’ll want to fade it out so set the Rendering Mode to Fade.
-
The Albedo property holds the actual texture; you can tint it by providing a color.
Drag the flint_like_rock_4787 image from the Textures folder in the Project window to the Albedo property:

-
You’ll notice the material looks a little too smooth, like it’s been polished:

Under the Metallic property, you’ll see two sliders. The first slider determines the metallic appearance of the material, while the other determines how rough the texture is.
For now, set the Metallic slider to 0.219
-
and the Smoothness slider to 0.149. Your Material should now look like this:


With the material all configured, you now need to add it to the asteroid. Drag your Asteroid material from the Project window to the Asteroid GameObject in the Scene view:

Awesome! You have an asteroid ready to cause lots of trouble, but first you need to add some behavior to it. Drag the Debris script from the Project window in the Scripts folder to the Asteroid.
The Debris script automatically added a Sphere Collider, Rigidbody, and Audio Source to the Asteroid. Now set-up all the required properties:
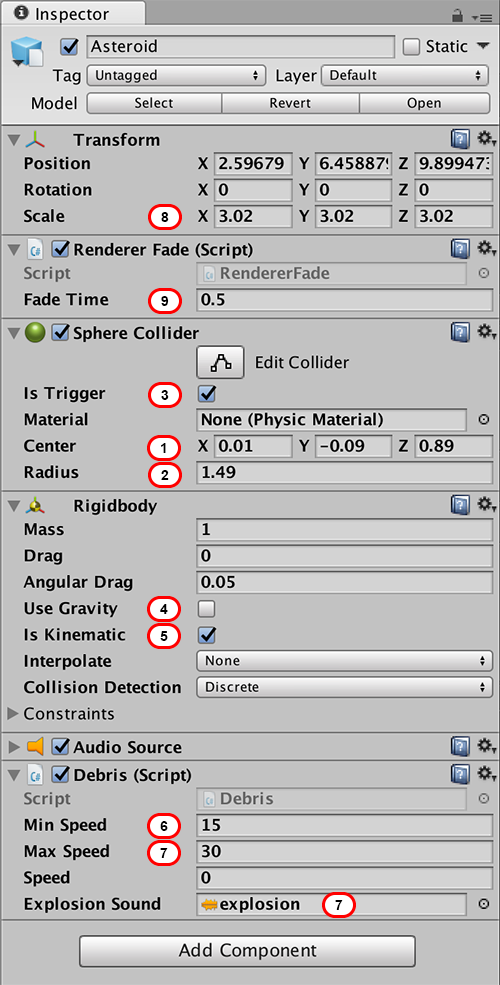
- Set the center of the Sphere Collider to (0.01, -0.09, 0.89)
- and the Radius to 1.49.
- Check the Is Trigger checkbox as well.
- For the Rigidbody, uncheck the Use Gravity checkbox
- and check the Is Kinematic checkbox.
- For the Debris script, set Min Speed to 15
- Set the Max Speed to 30
- and drag the explosion sound file from the Sounds folder to the Explosion Sound field.
- For the transform, of the Asteroid GameObject set the Scale to (3.02, 3.02, 3.02).
- Adding the Debris script also added the required Renderer Fade script. When a bullet collides with an asteroid, the asteroid should fade away instead of simply disappearing from the screen. The script only requires a fade time, so set Fade Time to 0.5.
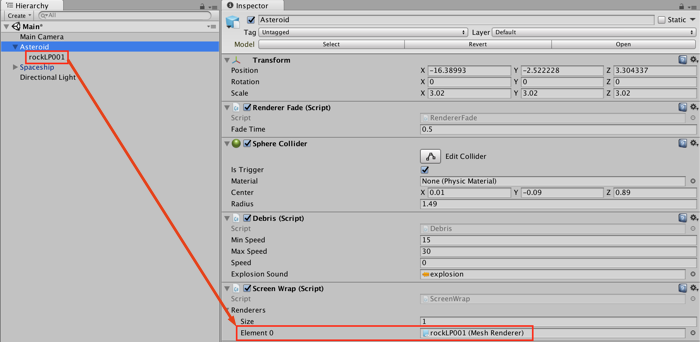
As asteroids drift off the screen, they should wrap just like the Spaceship. From the Scripts folder in the Project window, drag the ScreenWrap script to the Asteroid. Just as you did with the Spaceship, you’ll need to configure the ScreenWrap with the correct renderer.
The Asteroid has a child GameObject named rockLP001. Drag this child GameObject to the Renderers property of the Screen Wrap Script component in the Inspector for the Asteroid GameObject:
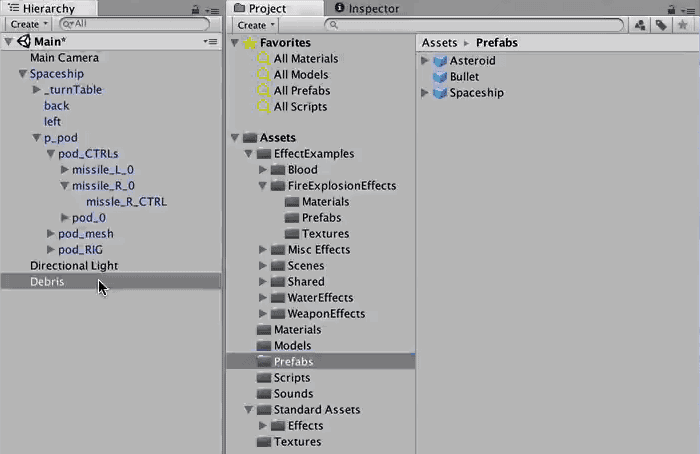
Finally, drag the Asteroid from the Hierarchy to the Prefab folder in the Project window. Now that you’re done creating your Asteroid Prefab, delete the Asteroid instance from the Hierarchy.
The last thing you need is a spawn point for all the asteroids. Click the Create button in the Hierarchy and select Create Empty. Name your spawn point Debris.
You’ll want this spawn point to be on the same plane as the player; otherwise, the player will either fly over or under the debris. A good GameObject to use as a reference is missle_R_0 since it’s located in the center of the model.
Drag the Debris GameObject and make it a child of missle_R_0. The transform coordinates of Debris will then be relative to its parent GameObject. To match the coordinates of the parent, set the Debris position to (0, 0, 0). With this little trick you can be sure that Spaceship and Debris are on the same plane.
Next, move the Debris to the bottom of the Hierarchy view where it originally was:
Move the Debris GameObject 15 points to the right. In case you didn’t manage to get that all exactly the same; its new position should be (20.0, 1.72, 7.06):
Putting It All Together
Now that you have your ship and an asteroid configured, you need to bring all the elements together and create a simple game.
Click the Create button in the Hierarchy and select Create Empty. In Inspector click on the name of the new GameObject and name it GameManager.
With the GameManager selected in the Hierarchy, click the Add Component button, select Scripts, then select GameManager. You’ll see that this action added an Audio Source as well. Also the GameManager component has several fields that you need to set that it will use to spawn asteroids.
Start with the Debris field. Make sure the Game Manager is selected in the Hierarchy, and drag the Asteroid Prefab into the Debris field. So what did you do here? The GameManager is responsible for spawning Asteroids. It uses the Debris field to decide which objects to spawn. You told it to use the Asteroid prefab.
Next still on GameManager set the Min Time to 2 and the Max Time to 5. This tells the script how quickly it should spawn asteroids. Set Total Items on Screen to 5, this limit the number of asteroids to 5 so that the player does not get overwhelmed. Drag the Debris GameObject from the Hierarchy to the Screen Debris field. This specifies that the GameManager should spawn asteroids on the Debris GameObject.
The GameManger component should look like the following:

Finally, in the Audio Source component, add background-music to the AudioClip field and make sure to check the loop checkbox.

Run your game and check out how everything looks:
Congratulations – you’ve built your very first game in Unity! In later tutorials, you’ll learn about the various subsections of Unity that really let you juice this game up. You’ll also learn how to write your own scripts to take advantage of Unity’s flexible API.
… and you did remember to save your work. Right? ;]
Where to Go From Here?
If you like, you can download Space Debris final from this tutorial.
To learn more about Unity, check out our other tutorials over here. Unity also has a ton of great free content over on YouTube.
As always, keep checking this site for more Unity tutorials. If you have any questions, feel free to reach out to me in the forums below!


Comments