Introduction to Unity: Getting Started – Part 1/2
Learn about the Unity Interface and how to create your first game in Unity with this Unity Tutorial for Beginners.

Update: This Unity tutorial was updated to Unity 5.5 by Mark Placzek. Original post by Brian Moakley.
![]()
When I first started looking into iOS game development, Xcode (before SpriteKit) made game development look very challenging. Unity on the other hand had a powerful visual editor and was also capable of publishing to mobile. Looking further, its asset store and fantastic developer community made Unity a very compelling option indeed.
Today it is able to boast more games being made with Unity than any other game technology. And with support for almost 30 platforms including mobile, VR, desktop and console, it’s no longer a great place to start, but the perfect place to start!
In the excellent original tutorial created by Brian Moakley, he compared Unity to a Lego set. I honestly can’t think of a better analogy. As you will learn here, Unity employs a fantastic modular system to build up scenes and characters in your game. Whether you are just starting out, you can still make a pretty awesome spaceship with the basic lego brick set.
Alternatively, if you are ready to go for the ‘highly sophisticated interlocking brick system’ only for adults, Unity gives you the ability to customize almost any component, such as writing your own shaders or rewriting the networking stacks to suit the needs of your game!
This is the first in a series of Unity tutorials designed to get you up to speed; in it, you’ll stick to the spaceport while you familiarize yourself with the engine environment and tools, while subsequent tutorials will focus on the details of each subsystem.
In this Unity tutorial, you’ll learn the following:
- How to install Unity and what the differences are between the four different versions.
- What the different views are that make up the Unity interface.
- How to navigate within the Scene view.
- How to add and manipulate GameObjects and their Components
The first part of the tutorial is all about familiarizing yourself with the Unity User Interface.
In the second part you will apply this knowledge to create your first game, a small space shooter. You will do so with the help of a fairy god mother that provides all the scripts and some models, so you can focus on the Unity Interface some more.
This tutorial is geared for those with little to no Unity experience. Ideally, you should have some programming experience, but if not, don’t sweat it – we’ll walk you through the whole thing! :]
Getting Started
The first step of this tutorial is to download Unity here. But wait – there are four different versions: Which should you choose?
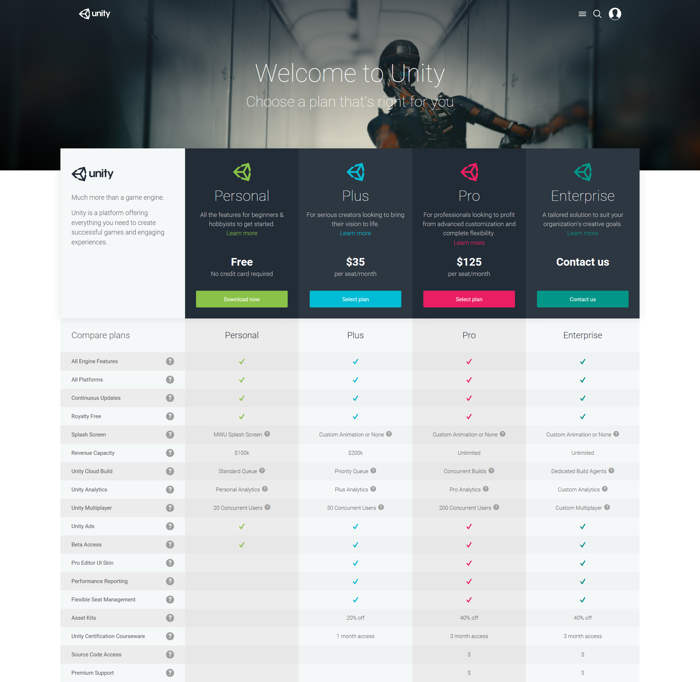
All versions of Unity make the same engine features available to you. Personal is free (as in beer), Plus costs $35 per seat/month, Pro $125 per seat/month and there is an Enterprise version where your custom needs will dictate the subscription price point.
The most noticeable difference is that games created with the Personal version have to start with a Unity splash screen, whereas any of the paid versions allow you to either remove the splash screen or create your own custom splash screen masterpiece.
Additionally different tiers of Unity’s services, such as Cloud build and analytics are unlocked at each price point.
Unity has some pretty strict rules about how you can use the Personal edition; before you start writing your next killer Unity app be sure to check out the Unity FAQ to see if you’re eligible to use it.
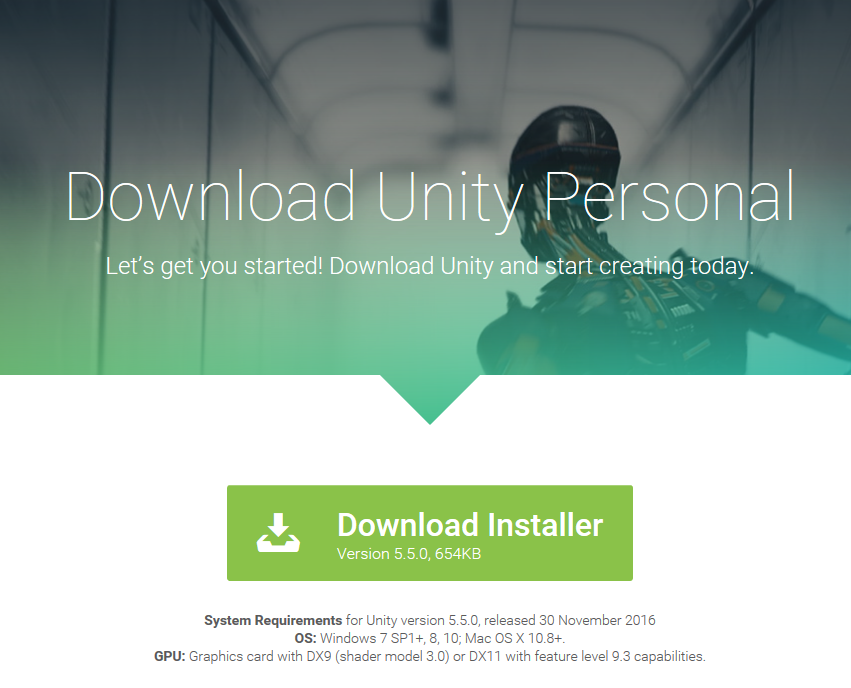
For the purpose of following the tutorials the Personal Edition is sufficient, so click the Free Download button. This will lead to a download page. Simply click on the huge Download installer button.
Run the installer and follow the instructions on screen, which means clicking Continue and accept the license agreement. Wait for the installation to complete then launch Unity; you’ll be prompted to login before you can go any further:

You’ll need to create a free Unity account in order to use the software if you don’t have one already. To create a Unity account, click the create one link and fill out the following form:

You’ll have to log in every time you use Unity, but it does offer an offline mode in case you need it.
Once you’ve created an account, logged into Unity, and confirmed all of your license details, the projects dialog will automatically appear. It allows you to create a new project and looks something like this:

Click the New project button; you’ll see the dialog switch to the following:
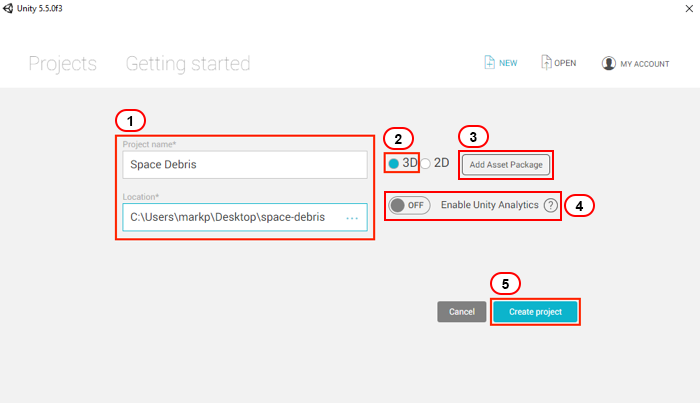
- Name your project Space Debris and pick a location on your hard drive to save it.
- You’ll notice that you have a few options: 3D or 2D, and a toggle for Unity Analytics. The 2D or 3D options determine the initial configuration of the editor; you can change these settings later if you decide to change your game type. For now, select 3D.
- The Asset packages button lets you import custom packages into your project. For instance, if you’re making a first person shooter, you may want to import Unity’s first-person controller package.

This is simply a convenience feature at the time of project creation; you’re able to import packages at any point during your project’s lifecycle. For this tutorial, you do not need any of the standard assets.
- Unity Analytics can be left Off as we will not be covering it in this tutorial.
- Finally click on Create project and Unity will open with your first project.
Breaking Down the Interface
When Unity first opens, you’ll see a window that looks like this:

The interface can be a bit overwhelming at first. Take a deep breath and tell yourself it’s going to be all right! :] The interface is highly customizable and can provide you with as much or as little information as you need.
In the upper right hand corner, you’ll see five buttons. Select the last one on the right which is called the em>Layout Dropdown, and from the list of options, select the 2 by 3 option:

Your editor should now look like the image below and have the following sections:
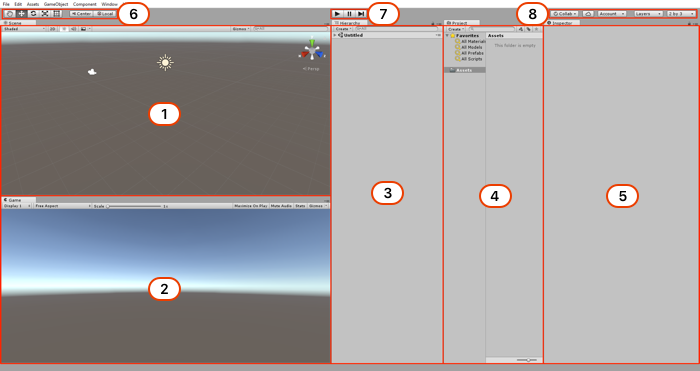
Here’s the breakdown of the various sections:
1. Scene View
The Scene view is where you construct your game; it’s where you add all models, cameras, and other pieces that make up your game. This is a 3D window where you can visually place all the assets you’re using like so:

As you test your game in Unity, the scene view will update itself with the current game’s state, and you can even add new elements on-the-fly to the scene. When you stop the game, the scene view will revert to its original state. Any changes you make to the Scene view while you’re playing the game will be lost when it stops.
2. Game View
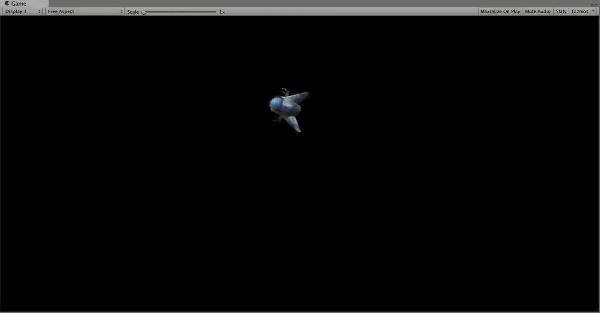
The Game view represents the player’s perspective of game. This where you can play your game and see how all its various mechanics work with one another:
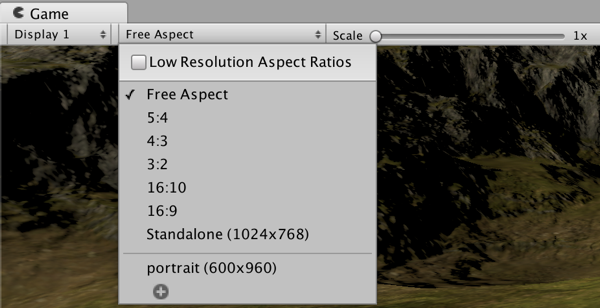
The Game view has an aspect ratio selector, which lets you change the dimensions of the view to match that of a specific screen aspect ratio (e. g. 4:3, 16:9, 16:10 …) or a device screen size such as that of an iPhone or iPad. This allows you to make sure it looks good on all aspect ratios and resolutions you want to support and that no important content is cut off. You can add a custom aspect ratio using the Plus button at the bottom of the dropdown.
3. Hierarchy window
The Hierarchy window contains a list of all the current GameObjects being used in your game. But what is a GameObject? That’s an easy one: a GameObject is an object in your game.
OK, there’s a bit more to them than that! :] In essence, GameObjects are empty containers which you customize through adding components. Components permit GameObjects to project geometry (from a simple cube up to more complex 3d models of towers or monsters), emit light, act as camera or even create complex behavior via scripts.
GameObjects can also act like folders, containing other GameObjects, which makes them quite useful for organizing your scene. You’ll see GameObjects in action in the second part of this tutorial.
A scene typically represents a single level of your game, although you could theoretically put the entire game inside one scene. Any GameObjects actively being used in your game in the current scene will appear in the Hierarchy window:
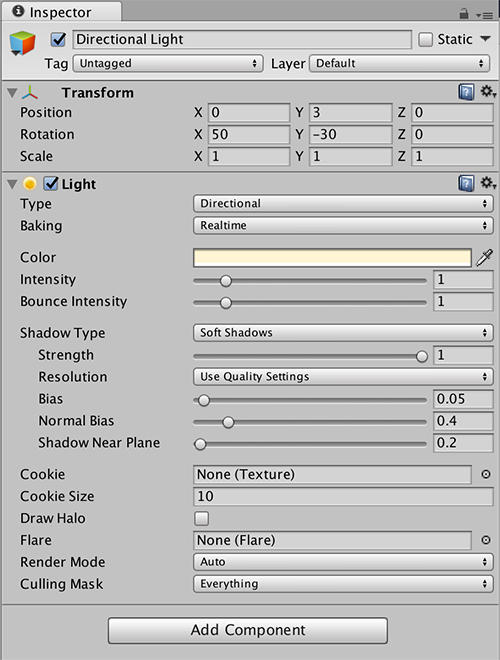
Every new scene starts with a Main Camera and a Directional Light, which are both GameObjects.
When you delete a GameObject from the Hierarchy, you’re effectively removing it from the scene.
As your scene grows with lots of GameObjects, the search bar will prove to be an invaluable tool:

4. Project window
The Project window contains all assets used by your game. You can organize your assets by folders, and when you wish to use them, you can simply drag those assets from the Project window to the Hierarchy window. Alternatively, you can drag them from the Project window to the Scene view. If you drag files from your computer into the Project window then Unity will automatically import those as assets for you.

Unity organizes the assets in the Project window the same as the OS file system. You may be tempted to make changes directly in the file system instead of in the Project window, but this is a big mistake that will break your assets – and possibly break your game!
Unity maintains metadata for each asset, so moving assets between folders on the file system breaks the metadata. If you need to make any organizational changes to your assets — especially prefabs — always perform them in the Project window.
5. Inspector window
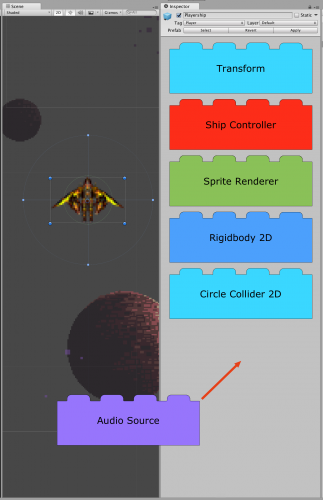
The Inspector window lets you configure any GameObject. When you select a GameObject in the Hierarchy, the Inspector will list all the appropriate components and their properties of that GameObject; for instance, a light will have a color field along with an intensity field. You can also alter values on your GameObjects while the game is being played.
6. Toolbar
You use the toolbar to manipulate the various GameObjects in the Scene view. You’ll be using the following tools a lot as you develop your game, so get familiar with them by trying out all of them on your empty project!
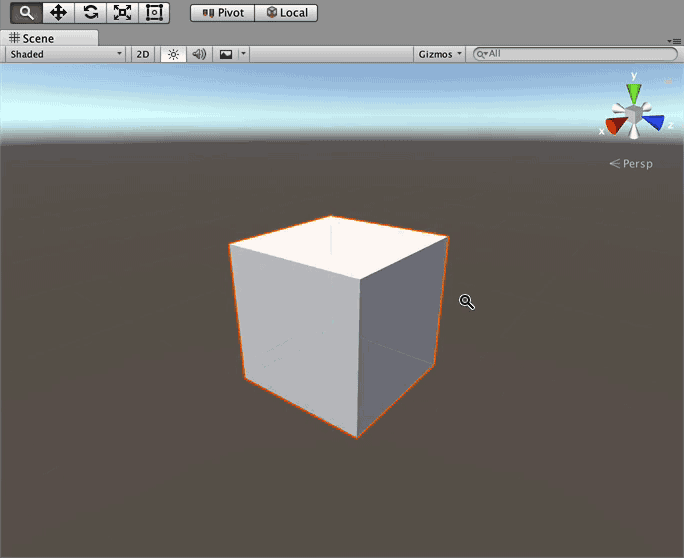
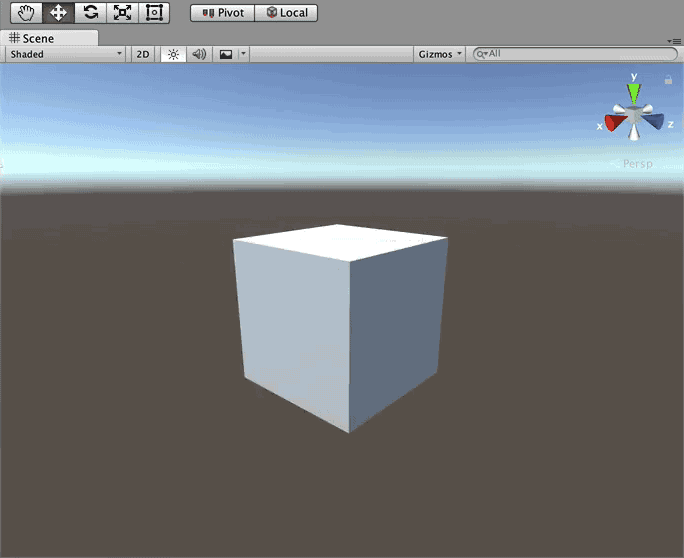
However, you won’t be able to see the effect very well in an empty Scene. So add a simple Cube to the scene:
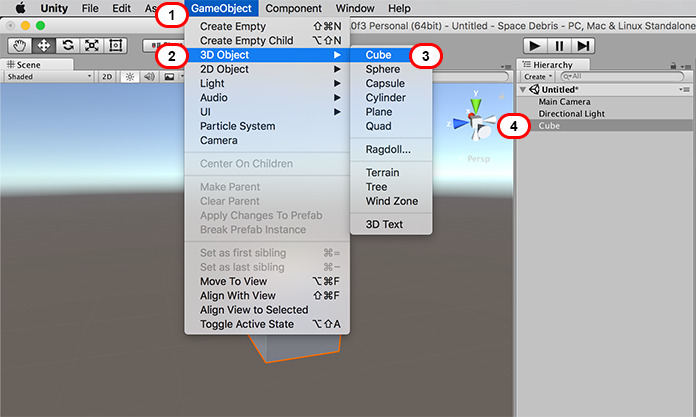
- Open the GameObject dropdown from the Unity Menu.
- Select the 3D Object dropdown.
- Select Cube from the list of available objects. This will give you a visual reference point while you explore the Toolbar options.
Note: if you lose track of the Cube while experimenting with the options, just Double Click the Cube GameObject in the Hierachy View. This will center the Cube for you in the Scene View.
The Hand tool is a “handy” tool (don’t worry folks, the jokes get worse!) with a bunch of useful features built right in:
![]()
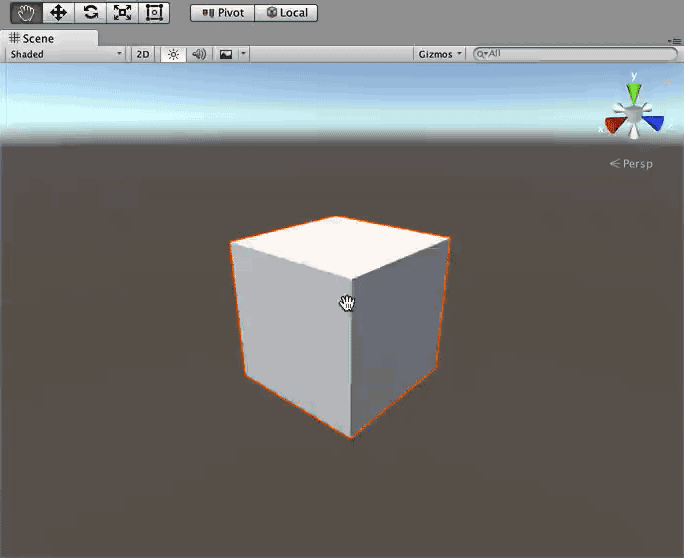
Select the Hand tool, then drag over the Scene view to pan the entire scene:
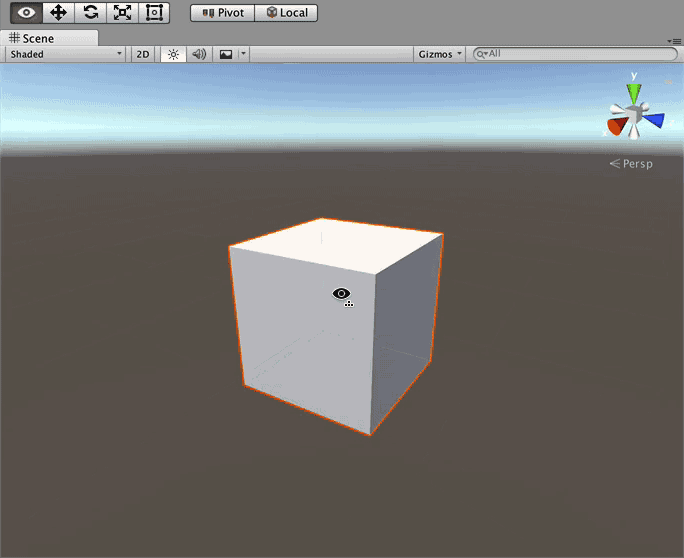
Right-click and drag to rotate the camera around your current position; notice that the hand icon transforms into an eye:
Next, hold down Ctrl (or Cmd) and Alt (or Option), right-click and move the mouse up to zoom into the scene. Moving the mouse down zooms out. Or if you want do it the easy way, just just use the scroll wheel:
Finally, hold down the right mouse button and use your WASD keys to move around the scene like you would in a first person shooter. Likewise, you can move up and down by pressing E or Q respectively. To move even faster, hold down the Shift key as well:
The hand tool’s default shortcut key is Q. To jump quickly to the hand tool, press the middle mouse button. Once you release it, you’ll return back to the previous tool you were using.
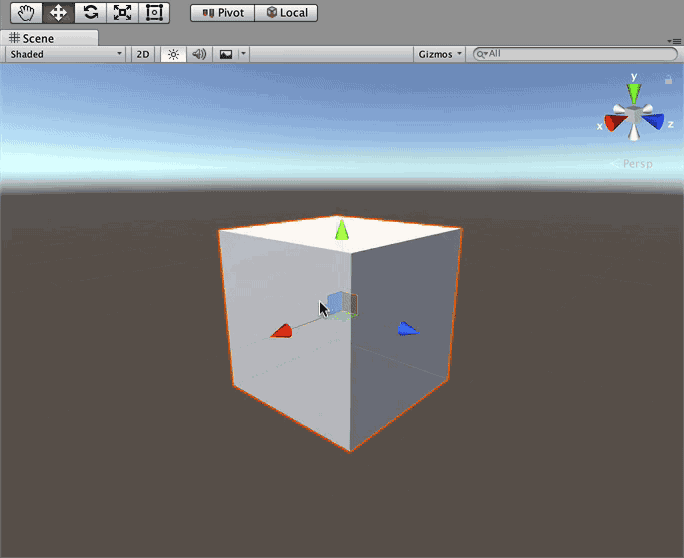
The Translate tool lets you select and position a GameObject in the scene:
![]()
You’ll notice when you select a GameObject while the Translate Tool is active, you’ll see three colored arrows growing from its center. These arrows indicate the three-dimensional axes of the object: the x-axis is the red arrow, the y-axis is the green arrow, and the z-axis is the blue arrow:
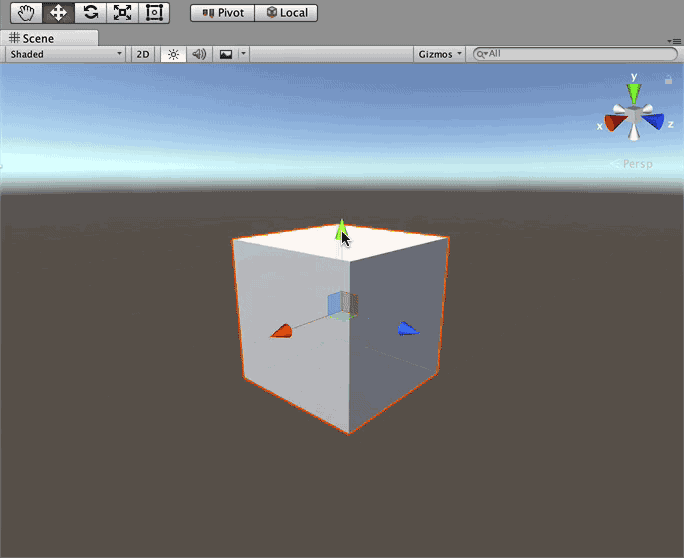
Unity’s coordinate system is left-handed. For a deeper explanation about left- and right-handed coordinate systems, check out this interesting article about the different coordinate systems..
In this case, the gizmo indicates the direction of each axis. As you learn more about Unity, you’ll be able to add your own gizmos to indicate things such as spawn points, the location of cameras or even the wind direction. The great thing about gizmos is they’re only displayed in the Scene View, and you can turn them off when they’re no longer needed.
There are many ways to move your GameObject with the Translate tool. You can select one of the arrows (which will turn Yellow when selected), then move the mouse; the GameObject will only move on that one axis. For example, if you selected the y-axis and moved an object while facing in a normal orientation, the GameObject would only move up or down.

Detailed view of the three axis and the three planes that you can select to move the GameObject.
The three colored planes in the center of the GameObject let you move the GameObject on two axes; the square’s color indicates on what plane it will move. For instance, a green square means you can move an object on the y-plane (which means it can move on the x and y-axes):
The default shortcut key for the translate tool is W.
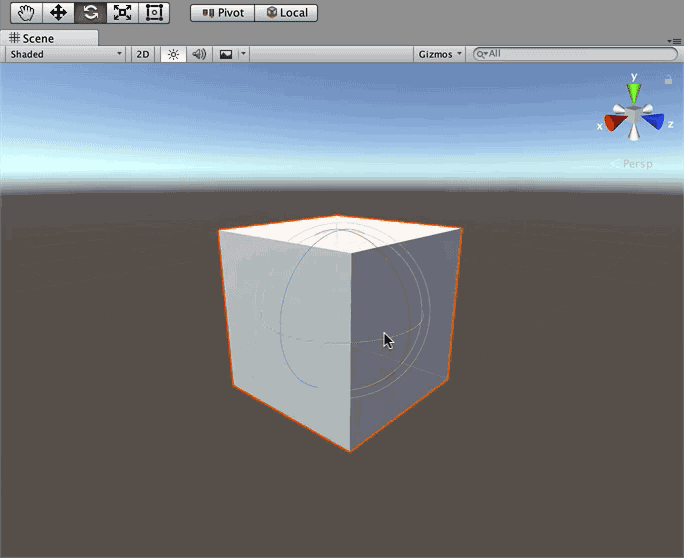
The rotate tool, unsurprisingly, lets you rotate objects:
![]()
You’ll notice three spherical colored lines when you select an object to rotate; these lines indicate the axis to rotate around. Simply select the line and drag your mouse to rotate the GameObject. To free rotate without being constrained to an axis, select the space between the lines and move your mouse:
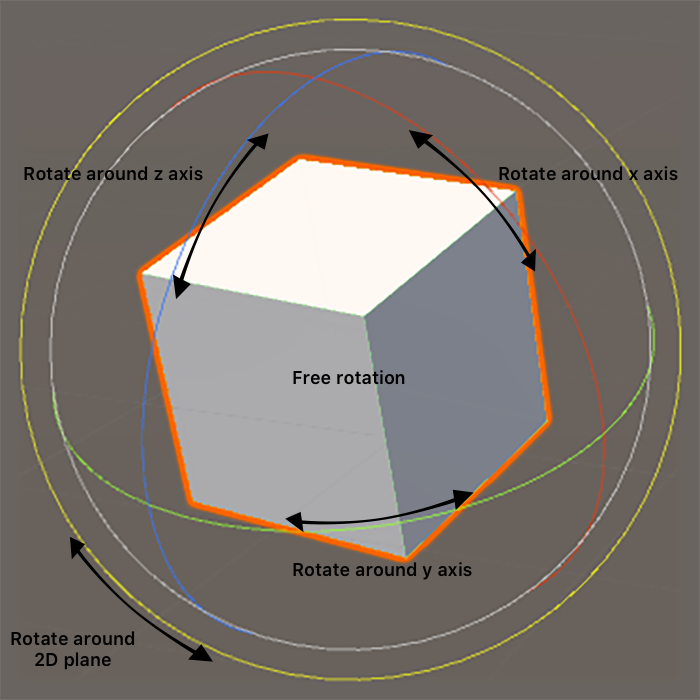
Select one of the colored lines to rotate around that axis.
The default shortcut key for the rotate tool is E.
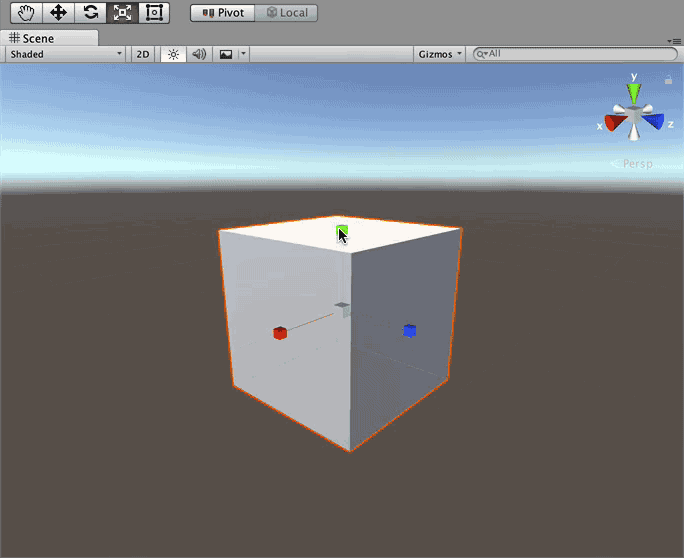
The Scale tool lets you scale a GameObject either along a single axis, or proportionately on all axes.
![]()
To scale an object along an axis, select the GameObject then drag the square end of an axis line; the GameObject will scale along that axis. To scale the entire GameObject, select the center point of the GameObject and drag the mouse either forwards or backwards to scale the GameObject up or down respectively:
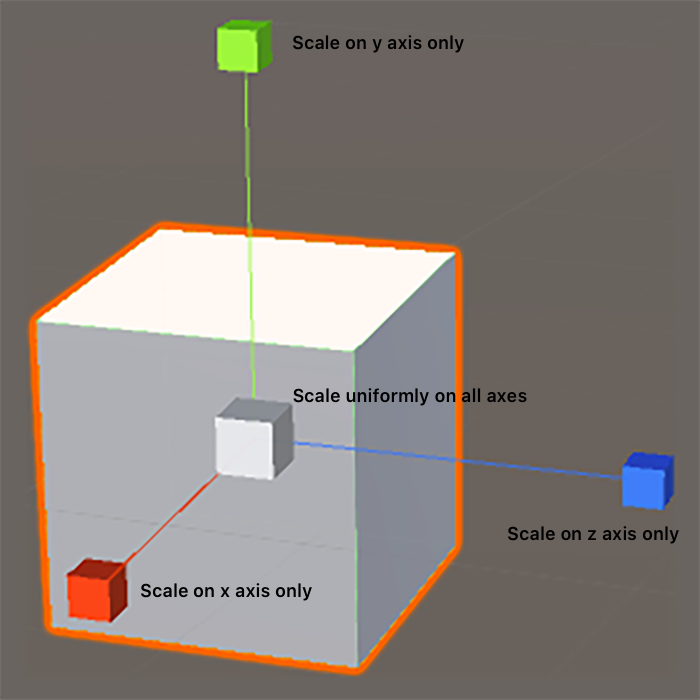
Scaling details; select one of the three axis to scale along that axis or the cube at the center of the axis to scale proportionally.
The default shortcut key for the scale tool is R.
Note: Some of you may be a bit confused by the shortcut keys. You’d assume the Scale shortcut would be the S key instead of R. Believe it or not, there is a method to the madness. Do you notice a familiar pattern in the shortcut keys…perhaps one right at your fingertips?
Yep, it’s the top row of the keyboard! :] Unity assumes you’re using the mouse with your right hand and keyboarding with your left. Your fingers, at rest on the home row, will be on the ASDF keys. You’ll note each shortcut key of the toolbar corresponds to a key above the home position. The keyboard shortcuts for the toolbar corresponds to the QWERT keys, from left to right.

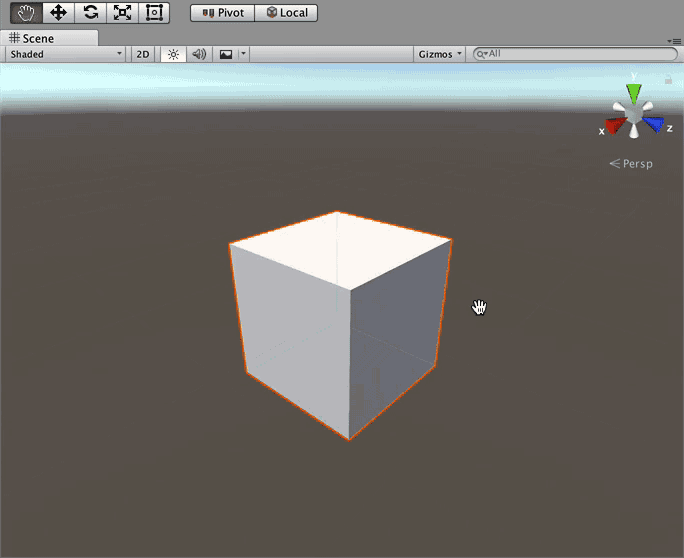
Unfortunately, occasionally you’ll try to press the W key but press the 2 key by mistake. This puts the editor into 2D mode and will look a lot like this:
In 2D mode, objects lose their depth
When that happens, simply press 2 again and the editor will revert back to 3D mode.
The Rect tool is primarily used with 2D GameObjects and User Interface (UI) GameObjects, although you can use it on 3D GameObjects as well.
![]()
The tool can resize, scale, and rotate 2D assets and also reset the pivot point, which is the center point of rotation for the object. The pivot point is represented by a large circle on the asset:

Can you guess its default shortcut key? That’s right, it’s T.
The gizmo display toggles tend to be a point of confusion; they’re more than buttons, in fact — they’re toggle switches that control how you position gizmos in your scene.
The first switch toggles between Center and Pivot mode. When in center mode, if you select two GameObjects, the gizmo will be placed in the center of the two objects. Rotating the GameObjects rotates them around the center gizmo. In pivot mode, each GameObject rotates around its own pivot point, as illustrated below:

The second switch toggles between Global and Local space. In global mode, you’re manipulating your object from the point of view of the world around it. The x-axis goes left to right, the y-axis goes up and down, and the z-axis goes forward and backwards like usual. Switching to local mode works from the coordinate system of the object itself, and changes the axes to match that of the actual GameObject:

7. Play Buttons
The Play Buttons let you start and stop your game. The first button is the Play button:

A few things happen when you click the Play button; First, your game will start, as expected. The button set will also turn blue to indicate the game is in motion:
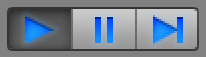
The entire design interface dims as well to indicate the game is active:

The top image is the editor while making the game whereas the lower image is the game being played.
Remember, any changes you make on-the-fly will be lost once you stop the game. It’s a common mistake for Unity beginners and regulars alike to run the game and make a pile of changes – which all disappear when the game stops! The interface dimming is supposed to help remind you of this unfortunate fact, but I find the color shade is too subtle to remind me all the time.
Thankfully, you can change this shading to suit.
- Open the Unity preferences window.
- Select the Colors tab on the left hand side and you’ll see a list of colors in the Colors section that you can customize in your interface:

The Playmode tint field controls the dimming color of the interface.

- You can choose any color by clicking in the indicated area.
- To reset to the original color simply click the Use Defaults button.
Next up is the Pause button:

This pauses your game and lets you make modifications to the game. Just like in play mode those modifications will be lost once you stop the game. Regard editing game objects during play and pause as a cheat and balancing system that allows you to experiment on your game without the danger of permanently breaking it.
Finally there’s the Step button:

This lets you step through your game one frame at a time; it’s handy when you want to observe animations on a frame-by-frame basis, or when you want to check the state of particular GameObjects during gameplay:

8. Miscellaneous Editor Settings
The final controls handle miscellaneous aspects of the editor. The first is the Collab drop-down. Found on the right hand side of the toolbar:

This is one of Unity’s latest services that helps big teams collaborate on a single project seamlessly.
The next button is the Services button. The services button is where you can add additional Unity services to the game. Clicking on the button will prompt you to create a Unity Project ID.

Once you add a Project ID, you will be able to add services to your project. For instance, you can add cloud builds to your project. This automatically builds your project for you so you don’t have to wait for each project build. You can also add Analytics, In-Game Ads, Multiplayer support, In-App Purchasing, Performance Reporting and Collaborate… umm… again, in case you missed it in the previous button.
You can also add team members to the project, set age restrictions, and change some important project settings.
Next up is the Account button, this lets you manage your Unity account. It allows you to view your account data, sign in and out, and upgrade:

The fourth button is the Layers button.

You can use Layers for such things as preventing the rendering of GameObjects, or excluding GameObjects from physics events like collisions.
The final button, Layouts, lets you create and save the layout of views in your editor and switch between them. Unity is wonderfully customizable, and each of the different views in a layout can be resized, docked, moved, or even removed from the editor altogether:
Watch as windows auto snap and dock as you drag them, alternatively you can keep them floating or drag them onto another monitor if you have a multi monitor setup!
Don’t worry though — you can always add views you’ve removed back to the interface. This lets you customize the editor for a specific task. For example, you may not want to have the Game View open when working with an animation, but you’d prefer to have the Animator and Animation Views open side-by-side.
Rearranging the windows every single time you wanted this specific layout would become tiresome very quickly. Unity saves you from this tedium by letting you save your layouts, which you can switch to at any time via the Layouts button. Opening a new widow can can easily be done using the Window menu item:

Layouts can be saved and recalled using the Layout button. Unity comes with a few pre-defined layouts, such as the 2 by 3 layout and Wide layouts. The Window option from the menubar provides a list of views that you can add to your editor.
As you work on games in Unity, you’ll find yourself creating many different layouts to support your various development tasks.
That covers the majority of the views you’ll use when making games, but there are many more views beyond just these. You can get an overview over them in the Unity documentation.
Where to Go From Here?
You made it through the introduction to Unity; in Part 2 of this tutorial you’ll put these concepts into practice as you create small space shooter. You’ll learn how to build games the “Unity” way and gain a deeper understanding of the various tools and techniques you’ll need to leverage to create your very own game.
Do you have any questions about this tutorial, or the Unity editor or any of its associated views? Join the discussion below and I’ll get back to you!


Comments