Introduction to Unity Scripting
In this tutorial, learn the basics of scripting in Unity by creating a classic arena shooter whereby geometric shapes try to crush you.


Much of the power of Unity is in its rich scripting language, C#. You can use it to handle user input, manipulate objects in the scene, detect collisions, spawn new GameObjects and cast directional rays around the scene to help with your game logic. It might sound intimidating, but Unity exposes well-documented APIs that make these tasks a breeze – even for novice developers!
In this tutorial, you’ll create a top-down shooter that uses Unity scripting to handle the spawning of enemies, player control, firing projectiles and other important aspects of the gameplay.
This tutorial was written for Unity 5.3 or greater. You can download the latest version of Unity here.
While Unity also supports UnityScript and Boo, C# is the programming language that most developers tend to use, and with good reason. C# is used by millions of developers around the globe for application, web and game development and there’s a plethora of information and tutorials to help you out.
Getting Started
Download the BlockBuster starter project, unzip it and open the created folder in Unity.
This is what you should see once opened:

Take a look around in the Scene view. There’s a small arena which will be the battleground for the game, a camera and a light. If your layout is different than in the screenshot, select the top-right drop down menu and change it to 2 by 3.

What’s a game without a hero? Your first task is to create a GameObject to represent the player in the scene.
Creating the Player
In the Hierarchy, click the Create button and select Sphere from the 3D section. Position the Sphere at (X:0, Y:0.5, Z:0) and name it Player:

Unity uses an entity-component system to build its GameObjects. This means all GameObjects are containers for components which can be attached to give it its behavior and properties. Here are a few examples of the components Unity has built-in:
- Tranform: Every GameObject comes with this component. It holds the position, rotation and scale of a GameObject.
- Box Collider: A collider in the shape of a cube which can be used to detect collisions.
- Mesh Filter: The mesh data which is used to show a 3D model.

The Player GameObject will need to respond to collisions with other objects in the scene.
To make this happen, select the Player in the Hierarchy window and click the Add Component button in the Inspector window. Select Physics > Rigidbody in the menu that pops up, this will add a Rigidbody component to the Player so it can make use of Unity’s physics engine.
Adjust the Rigidody’s values like this: Set Drag to 1, Angular Drag to 0 and check the Y checkbox next to Freeze Position.

This will make sure the Player won’t be able to move up and down and has no added damping when rotating.
Creating the Player Movement Script
Now that the Player is ready, it’s time to create the script that will take input from the keyboard and move the Player around.
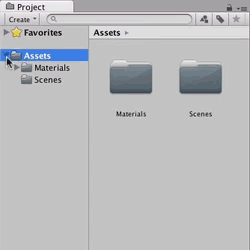
In the Project window, click the Create button and select Folder. Name the new folder Scripts and create a subfolder within it named Player.
Inside the Player folder, click the Create button and select C# Script. Name your new script PlayerMovement. The sequence looks like this:
Double-click the PlayerMovement.cs script. This will open your preferred code editor with the script loaded. Unity comes with MonoDevelop pre-installed on all platorms and Windows users can choose to install Visual Studio and use that instead when they run the installer.
This tutorial assumes you’re using MonoDevelop but Visual Studio users should be able to follow along without any issues.
Once your editor of choice opens up, you’ll be greeted by the following:

This the default class Unity generates for new scripts. It’s derived from the base class MonoBehaviour which makes sure this script will be running in the game loop and has additional functionality to react on certain events. If you come from the iOS world, this object is the equivalent of a UIViewController. Unity calls several methods in a predetermined order as the script is running. Here are a few of the most common ones:
-
Start(): This method will get called once right before the script gets its first update. -
Update(): While the game is running and the script is enabled, this method will get fired every frame. -
OnDestroy(): This method gets called right before the GameObject this script is attached to gets destroyed. -
OnCollisionEnter(): When the collider or rigidbody this script is attached to touches another collider or rigidbody, this method gets called.
For a full list of events, check out Unity’s documentation on MonoBehaviours.
Add these two lines above the Start() method:
public float acceleration;
public float maxSpeed;
This is what it should look like:

These are public variable declarations, which means that these variables will be visible in the Inspector and can be tweaked without having to go back and forth between the script and the editor.
acceleration describes how much the Player's speed increases over time. maxSpeed is the “speed limit”.
Just below that, declare the following variables:
private Rigidbody rigidBody;
private KeyCode[] inputKeys;
private Vector3[] directionsForKeys;
Private variables can’t be set through the Inspector, it’s the developers’ responsibility to initialize them at the appropriate time.
rigidBody will hold a reference to the Rigidbody component that’s attached to the Player GameObject.
inputKeys is an array of keycodes that will be used to detect input.
directionsForKeys holds an array of Vector3 variables, which will hold directional data.
Replace the Start() method with the following:
void Start () {
  inputKeys = new KeyCode[] { KeyCode.W, KeyCode.A, KeyCode.S, KeyCode.D };
  directionsForKeys = new Vector3[] { Vector3.forward, Vector3.left, Vector3.back, Vector3.right };
  rigidBody = GetComponent<Rigidbody>();
}
This piece of code links the corresponding directions for each key, e.g. pressing W moves the object forward. The last line gets a reference to the atttached Rigidbody component and saves it in the rigidBody variable for later use.
To actually move the Player, you’ll have to handle input from the keyboard.
Rename Update() to FixedUpdate() and add the following code:
// 1
void FixedUpdate () {
  for (int i = 0; i < inputKeys.Length; i++){
    var key = inputKeys[i];

    // 2
    if(Input.GetKey(key)) {
      // 3
      Vector3 movement = directionsForKeys[i] * acceleration * Time.deltaTime;
    }
  }
}
There are couple of important things going on here:
-
FixedUpdate()is frame rate independent and should be used when working with Rigidbodies. Instead of running as fast as possible, this method will be fired at a constant interval. - This loop checks to see if any of the input keys were pressed.
- Get the direction for the pressed key, multiply it by the acceleration and the number of seconds it took to complete the last frame. This produces a direction vector (speed on the X, Y and Z axes) that you'll use to move the
Playerobject.
If you are new to game programming, you might ask yourself why you have to multiply by Time.deltaTime. While the game is running the framerate (or frames per second) will vary depending on the hardware and the stress it is under, this might cause things to happen too fast on powerful machines and too slow on weaker ones which can cause undesired behaviour. The general rule is when you perform an action every (fixed) frame, you need to multiply by Time.deltaTime.
Add the following method below FixedUpdate():
void movePlayer(Vector3 movement) {
  if(rigidBody.velocity.magnitude * acceleration > maxSpeed) {
    rigidBody.AddForce(movement * -1);
  } else {
    rigidBody.AddForce(movement);
  }
}
The above method applies force to the ridigbody, causing it to move. If the current speed exceeds maxSpeed, the force goes in the opposite direction to slow the player down and effectively limits the maximum speed.
In FixedUpdate(), before the closing brace of the if-statement, add the following line::
movePlayer(movement);

Perfect! Save this script and return to the Unity editor. In the Project window, drag the PlayerMovement script onto the Player inside the Hierarchy.
Adding a script to a GameObject creates an instance of a component, which means all the code will get executed for the GameObject you attached it to.
Use the Inspector to set Acceleration to 625 and Max Speed to 4375:

Run the scene and move the Player around with the WASD keys:

That's a pretty good result for only a few lines of code! :]
However, there is one obvious issue - the player can quickly move out of sight, which makes it a little difficult to fight the bad guys.
Creating the Camera Script
In the Scripts folder, create a new script called CameraRig and attach it to the Main Camera. Need a bit of help to figure out the steps? You can check the hint below for the solution.
[spoiler]With the Scripts folder selected, click the Create button in the Project Browser, then select C# Script. Name the new script CameraRig. Finally, drag and drop it over the Main Camera object like so:
 [/spoiler]
Now create the following variables inside the newly created CameraRig class, right above the Start() method:
public float moveSpeed;
public GameObject target;

private Transform rigTransform;
As you might have guessed, moveSpeed is the speed with which the camera will follow the target – which can be any game object inside the scene.
Inside of Start(), add the following line:
rigTransform = this.transform.parent;
This code gets a reference to the parent Camera object's transform in the scene hierarchy. Every object in a scene has a Transform, which describes the position, rotation and scale of an object.

In the same script, add the method below:
void FixedUpdate () {
  if(target == null){
    return;
  }

  rigTransform.position = Vector3.Lerp(rigTransform.position, target.transform.position,
    Time.deltaTime * moveSpeed);
}
The CameraRig movement code is a bit simpler than the one in PlayerMovement. This is because you don't need a Rigidbody; simply interpolating between the positions of the rigTransform and target is enough.
Vector3.Lerp() takes two points in space and a float in the range of [0, 1], which describes a point along the two endpoints. The left endpoint is 0, and the right endpoint is 1. Passing in 0.5 to Lerp() would return a point exactly between both endpoints.
This moves the rigTransform closer to the target position with a little bit of easing. In short – the camera follows the player.
Return to Unity. Make sure the Main Camera is still selected in the Hierarchy. In the Inspector, set the Move Speed to 8 and the Target to the Player:

Run the game and move around the scene; the camera should follow the target transform smoothly wherever it goes.

Creating an Enemy
A shooter game without enemies would be easy to beat, but a bit boring. :] Create an enemy cube by clicking GameObject\3D Object\Cube from the top menu. Rename your Cube to Enemy and add a Rigidbody component.
In the Inspector, first set the Cube's Transform to (0, 0.5,4). In the Constraints section of the Rigidbody component, check the Y checkbox in the Freeze Position category.

Excellent - now to make your enemies move around in a menacing manner. Create a script named Enemy in the Scripts folder. You should be a pro at this by now, but if not, check the instructions earlier in the tutorial for reference.
Next, add the following public variables inside the class:
public float moveSpeed;
public int health;
public int damage;
public Transform targetTransform;
You probably can figure out what those variables represent without too much difficulty. You used moveSpeed earlier to create the camera rig, and it has the same effect here. health and damage help determine when an enemy should die and how much their death will hurt the Player. Finally, targetTransform references the Player's transform.
Speaking of the Player, you'll need to create a class to represent all the Player goodness that the enemy wants to destroy.
In the Project Browser, select Player folder and create a new script named Player; this script will react to collisions and keep track of the Player's health. Double-click the script to edit it.
Add the following public variable to store the Player's the health:
public int health = 3;
This provides a default value for the health, but it can be modified in the Inspector as well.
To handle collisions, add the following methods:
void collidedWithEnemy(Enemy enemy) {
  // Enemy attack code
  if(health <= 0) {
    // Todo
  }
}

void OnCollisionEnter (Collision col) {
    Enemy enemy = col.collider.gameObject.GetComponent<Enemy>();
    collidedWithEnemy(enemy);
}
OnCollisionEnter() triggers when two rigidbodies with colliders touch. The Collision argument contains information about such things as contact points and impact velocities. In this case, you're only interested in the Enemy component of the colliding object, so you can call collidedWithEnemy() and execute the attack logic – which you'll add next.
Switch back to Enemy.cs and add the following methods:
void FixedUpdate () {
  if(targetTransform != null) {
    this.transform.position = Vector3.MoveTowards(this.transform.position, targetTransform.transform.position, Time.deltaTime * moveSpeed);
  }
}

public void TakeDamage(int damage) {
  health -= damage;
  if(health <= 0) {
    Destroy(this.gameObject);
  }
}

public void Attack(Player player) {
  player.health -= this.damage;
  Destroy(this.gameObject);
}
You're already familiar with FixedUpdate(), the slight difference is you're using MoveTowards() instead of Lerp(). This is because the Enemy should move at the same speed all the time and not ease-in as it approaches the target. When an enemy is hit with a projectile, TakeDamage() is called; when the Enemy gets to 0 health it will destroy itself. Attack() is similar - it applies damage to the Player and then the enemy destroys itself.
Switch back to Player.cs and in collidedWithEnemy(), replace the Enemy attack code comment with the following:
enemy.Attack(this);
The player will take damage and the enemy will self destruct in the process.
Switch back to Unity. Attach the Enemy script to the Enemy object and in the Inspector, set the following values on the Enemy:
- Move Speed: 5
- Health: 2
- Damage: 1
- Target Transform: Player
By now you should be able to do all of this yourself. Try it on your own, and then compare the result with the GIF below:
[spoiler]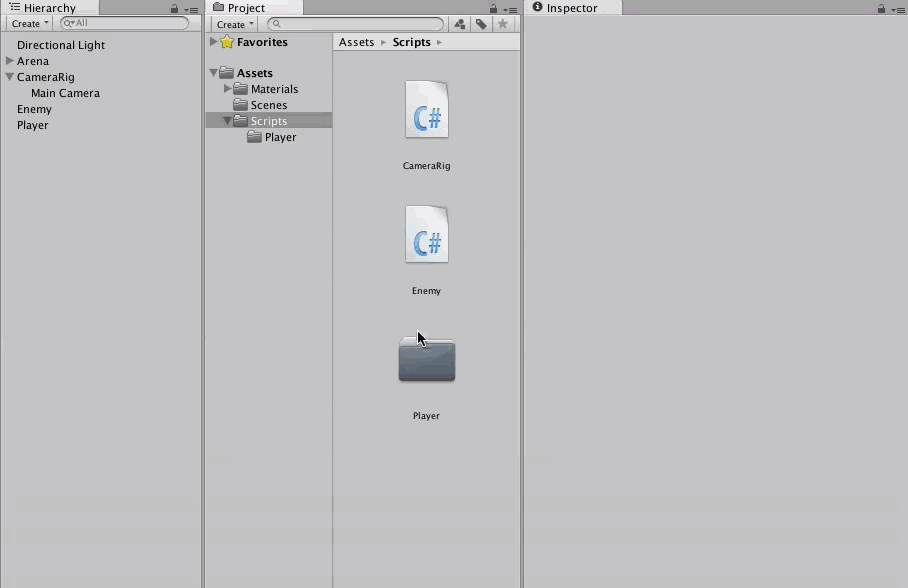 [/spoiler]
In the game, an Enemy collising with the Player constitutes a valid enemy attack. Detecting collisions with Unity's physics is almost a trivial task.
Finally, attach the Player script to the Player in the Hierarchy.
Run the game, and keep an eye on the console:

When the enemy reaches the Player, it performs the attack successfully and reduces the Player's health variable to 2. However there is a NullReferenceException thrown in the console, pointing to the Player script:

Aha - the Player can collide not only with enemies, but also other parts of the game world, such as the Arena. These game objects don't have an Enemy script and therefore GetComponent returns null.
Open Player.cs. In OnCollisionEnter(), wrap collidedWithEnemy() in an if statements:
if(enemy) {
  collidedWithEnemy(enemy);
}
No more nulls!
Working with Prefabs
Simply running around and avoiding enemies is a pretty one-sided game. Its time to arm the Player for combat.
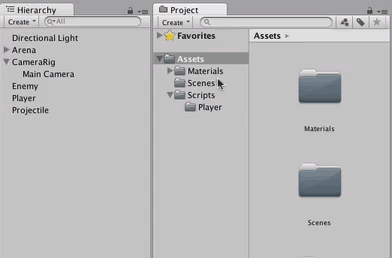
Click the Create button in the Hierarchy and select 3D Object/Capsule. Name it Projectile and give it the following transform values:
- Position: (0, 0, 0)
- Rotation: (90, 0, 0)
- Scale: (0.075, 0.246, 0.075)

Each time the Player shoots, it will fire an instance of Projectile. To make this happen, you need to create a Prefab. Unlike the objects you already have in the scene, Prefabs are created on-demand by the game logic.
Create a new folder under Assets, called Prefabs. Now drag the Projectile object into this folder. That's it: you have a Prefab!
Your Prefab will need a bit of script. Create a new script inside the Scripts folder named Projectile and add to it the following class variables:
public float speed;
public int damage;

Vector3 shootDirection;
Just like any moving object so far in this tutorial, this one will also have speed and damage variables, since it's part of the combat logic. The shootDirection vector determines where the Projectile will go.
Put that vector to work by implementing the following methods inside the class:
// 1
void FixedUpdate () {
  this.transform.Translate(shootDirection * speed, Space.World);
}

// 2
public void FireProjectile(Ray shootRay) {
  this.shootDirection = shootRay.direction;
  this.transform.position = shootRay.origin;
}

// 3
void OnCollisionEnter (Collision col) {
  Enemy enemy = col.collider.gameObject.GetComponent<Enemy>();
  if(enemy) {
    enemy.TakeDamage(damage);
  }
  Destroy(this.gameObject);
}
Here's what's going on in the above code:
- The
Projectilemoves differently than everything else in this game. It doesn't have a target, or some force applied to it over time; instead, it moves in a predetermined direction for its entire lifecycle. - Here you set the starting position and direction of the Prefab. This
Rayargument seems pretty mysterious, but you'll soon learn how it's calculated. - If a projectile collides with an enemy, it calls
TakeDamage()and destroys itself.
In the scene Hierarchy, attach the Projectile script to the Projectile GameObject. Set the Speed to 0.2 and Damage to 1, then click the Apply button located near the top of the Inspector. This will apply the changes you just made to all instances of this prefab.

Remove the Projectile object from the scene Hierarchy - you don't need it anymore.
Firing Projectiles
Now that you have a prefab that can move and apply damage, you're ready to start shooting.
Inside the Player folder, create a new script named PlayerShooting and attach it to the Player in the scene. Inside the class, declare the following variables:
public Projectile projectilePrefab;
public LayerMask mask;
The first variable will contain a reference to the Projectile Prefab you created earlier. Every time your Player fires a projectile, you'll create a new instance from this Prefab. The mask variable is used to filter GameObjects.
Wait, casting Rays? What is this sorcery?
No, there's no black magic afoot - there are times in your game when you'll need to know if a collider exists in a particular direction. To do this, Unity can cast an invisible ray from a certain point to a direction you specify. You'll likely encounter a lot of GameObjects that intersect with the ray, so using a mask lets you filter out any unwanted objects.
Raycasts are incredibly useful and can used for a variety of purposes. They're commonly used to test if another player has been struck by a projectile, but you can also use them to test if there is any geometry underneath a mouse pointer. To learn more about Raycasts, check out this Unity live training video on the Unity site.
The image below shows a ray cast from a cube to a cone. Since the ray has a iconsphere mask on it, it ignores that GameObect and reports a hit on the cone:

Now it's time for you to fire your own rays.
Add the following method to PlayerShooting.cs:
void shoot(RaycastHit hit){
  // 1
  var projectile = Instantiate(projectilePrefab).GetComponent<Projectile>();
  // 2
  var pointAboveFloor = hit.point + new Vector3(0, this.transform.position.y, 0);

  // 3
  var direction = pointAboveFloor - transform.position;

  // 4
  var shootRay = new Ray(this.transform.position, direction);
  Debug.DrawRay(shootRay.origin, shootRay.direction * 100.1f, Color.green, 2);

  // 5
  Physics.IgnoreCollision(GetComponent<Collider>(), projectile.GetComponent<Collider>());

  // 6
  projectile.FireProjectile(shootRay);
}
Here's what the above code does:
- Instantiates a projectile Prefab and gets its
Projectilecomponent so it can be initialized. - This point always looks like
(x, 0.5, z). X and Z are coordinates on the floor where the ray cast from the mouse click position hits. This calculation is important, because the projectile has to be parallel to the floor – otherwise you'd be shooting downward, and only amateurs shoot towards the ground. :] - Calculates the direction from the Player GameObject to
pointAboveFloor. - Creates a new ray that describes the projectile trajectory by its origin and direction.
- This line tells Unity's physics engine to ignore collisions between the
Player colliderandProjectile collider. OtherwiseOnCollisionEnter()in theProjectile scriptwould be called before it had the chance to fly off. - Finally, it sets the trajectory for the projectile.
Debug.DrawRay() when ray casting is invaluable as it can help you visualize how the ray looks and what it hits.With the firing logic in place, add the following methods to let the player actually pull the trigger:
// 1
void raycastOnMouseClick () {
  RaycastHit hit;
  Ray rayToFloor = Camera.main.ScreenPointToRay(Input.mousePosition);
  Debug.DrawRay(rayToFloor.origin, rayToFloor.direction * 100.1f, Color.red, 2);

  if(Physics.Raycast(rayToFloor, out hit, 100.0f, mask, QueryTriggerInteraction.Collide)) {
    shoot(hit);
  }
}

// 2
void Update () {
  bool mouseButtonDown = Input.GetMouseButtonDown(0);
  if(mouseButtonDown) {
    raycastOnMouseClick();
  }
}
Taking each numbered comment in turn:
- This method casts a ray from the camera to the point where the mouse clicked. Then it checks to see if this ray intersects a game object with the given LayerMask.
- On every update, the script checks for a left mouse button press. If it finds one, it calls
raycastOnMouseClick().
Return back to Unity and set up the following variables in the Inspector:
- Projectile Prefab: reference the Projectile from the prefab folder
- Mask: Floor

You can create your own by clicking the Layer dropdown of a GameObject and selecting Add Layer:
To assign a layer to a GameObject, select it from the Layer dropdown:

For more information about layers, check out Unity's Layers documentation.
Run the project and fire at will! The projectiles are fired in the desired direction, but something seems a bit off, doesn't it?

It would be much cooler if the projectiles were pointing in the direction of travel. To fix this, open up the Projectile.cs script and add the following method:
void rotateInShootDirection() {
  Vector3 newRotation = Vector3.RotateTowards(transform.forward, shootDirection, 0.01f, 0.0f);
  transform.rotation = Quaternion.LookRotation(newRotation);
}
RotateTowards is very similar to MoveTowards, but it treats vectors as directions instead of positions. Also, you don't need to change rotation over time so using a step close to zero will suffice. Transform rotations in Unity are expressed using quaternions, which are beyond the scope of this tutorial. All you need to know for this tutorial is that they have advantages over vectors when making calculations that involve rotations in 3D.
Interested in learning more about quaternions and why they're useful? Check out this excellent article: How I learned to Stop Worrying and Love Quaternions
At the end of FireProjectile(), add a call to rotateInShootDirection(). FireProjectile() should now look like the following:
public void FireProjectile(Ray shootRay) {
  this.shootDirection = shootRay.direction;
  this.transform.position = shootRay.origin;
  rotateInShootDirection();
}
Run the game once again and fire in a few different directions; this time the projectiles will point in the direction they are shot:

Remove the Debug.DrawRay calls as you won't need them further.
Generating More Bad Guys
Having only one enemy isn't terribly challenging. But now that you know about Prefabs, you can spawn all the adversaries you want! :]
To keep the player guessing, you can randomize the health, speed and location of each Enemy.
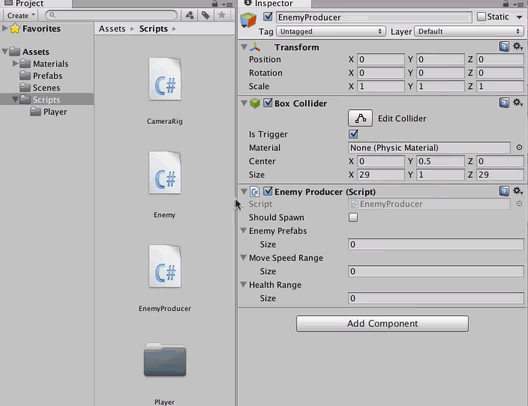
Creating an empty game object - GameObject\Create Empty. Name it EnemyProducer and add a Box Collider component. Set the values in the Inspector as follows:
- Position: (0, 0, 0)
-
Box Collider:
- Is Trigger: true
- Center: (0, 0.5, 0)
- Size: (29, 1, 29)

The collider you attached defines a particular 3D space inside the Arena. To see this, select the Enemy Producer GameObject in the Hierarchy and look inside the Scene view:

The green wire outlines represent a collider.
You are about to write a script that picks a random location in this space along the X and Z axis and instantiates an enemy Prefab.
Create a new script called EnemyProducer and attach it to the EnemyProducer GameObject. Inside the newly set up class, add the following instance members:
public bool shouldSpawn;
public Enemy[] enemyPrefabs;
public float[] moveSpeedRange;
public int[] healthRange;

private Bounds spawnArea;
private GameObject player;
The first variable enables and disables spawning. The script will pick a random enemy prefab from enemyPrefabs and instantiate it. The next two arrays will specify a minimal and maximal value of speed and health. The spawn area is that green box you saw in the Scene view. Finally, you'll need a reference to the Player and pass it as target to the bad guys.
Inside the script, define the following methods:
public void SpawnEnemies(bool shouldSpawn) {
  if(shouldSpawn) {
    player = GameObject.FindGameObjectWithTag("Player");
  }
  this.shouldSpawn = shouldSpawn;
}

void Start () {
  spawnArea = this.GetComponent<BoxCollider>().bounds;
  SpawnEnemies(shouldSpawn);
  InvokeRepeating("spawnEnemy", 0.5f, 1.0f);
}
SpawnEnemies() gets a reference of a game object with tag Player and determines whether an enemy should spawn.
Start() initializes the spawn area and schedules the invocation of a method 0.5 seconds after the game starts. It will get called repeatedly every second. Besides acting as a setter method, SpawnEnemies() also gets a reference of a game object with tag Player.
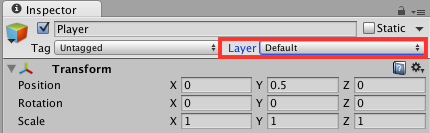
The Player game object isn't tagged yet - you'll do that now. Select the Player object from the Hierarchy and then in the Inspector tab, choose Player from the Tag dropdown menu:

Now, you need to write the actual spawning code for an individual enemy.
Open up the Enemy script and add the method below:
public void Initialize(Transform target, float moveSpeed, int health) {
  this.targetTransform = target;
  this.moveSpeed = moveSpeed;
  this.health = health;
}
This simply acts as a setter for creating the object. Next up: the code to spawn your leagues of enemies. Open EnemyProducer.cs and add the following methods:
Vector3 randomSpawnPosition() {
  float x = Random.Range(spawnArea.min.x, spawnArea.max.x);
  float z = Random.Range(spawnArea.min.z, spawnArea.max.z);
  float y = 0.5f;

  return new Vector3(x, y, z);
}

void spawnEnemy() {
  if(shouldSpawn == false || player == null) {
    return;
  }

  int index = Random.Range(0, enemyPrefabs.Length);
  var newEnemy = Instantiate(enemyPrefabs[index], randomSpawnPosition(), Quaternion.identity) as Enemy;
  newEnemy.Initialize(player.transform,
      Random.Range(moveSpeedRange[0], moveSpeedRange[1]),
      Random.Range(healthRange[0], healthRange[1]));
}
All that spawnEnemy() does is pick a random enemy prefab, instantiate it at a random position and initialize the Enemy script public variables.
EnemyProducer.cs is almost ready to go!
Return back to Unity. Create an Enemy prefab by dragging the Enemy object from the Hierarchy to the Prefabs folder. Remove the enemy object from the scene - you don't need it anymore. Next set the Enemy Producer script public variables like so:
- Should Spawn: True
-
Enemy Prefabs:
- Size: 1
- Element 0: Reference the enemy prefab
-
Move Speed Range:
- Size: 2
- Element 0: 3
- Element 1: 8
-
Health Range:
- Size: 2
- Element 0: 2
- Element 1: 6
Run the game and check it out - an endless stream of bad guys!

Okay, those cubes don't look terribly frightening. Time to spice things up.
Create a 3D Cylinder and Capsule in the scene. Name them Enemy2 and Enemy3 respectively. Just as you did earlier with the first enemy, add a Rigidbody component and the Enemy script to both of them. Select Enemy2 and change its configuration in the Inspector like so:
- Scale: (0, 0.5, 0)
-
Rigidbody:
- Use Gravity: False
- Freeze Position: Y
- Freeze Rotation: X, Y, Z
-
Enemy Component:
- Move Speed: 5
- Health: 2
- Damage: 1
- Target Transform: None
Now do the same for Enemy3, but set its Scale to 0.7:

Next, turn them into Prefabs, just as you did with the original Enemy, and reference all of them in the Enemy Producer. The values in the Inspector should look like this:
-
Enemy Prefabs:
- Size: 3
- Element 0: Enemy
- Element 1: Enemy2
- Element 2: Enemy3

Run the game; you'll see different prefabs spawn inside the Arena.

It won't take long before you realize that you're invincible! As awesome as that is, you need to level the playing field a bit.
Implementing the Game Controller
Now that you have shooting, movement and enemies in place, you'll implement a basic game controller. It will restart the game once the Player is "dead". But first, you'll have to create a mechanism to notify any interested parties that the Player has reached 0 health.
Open the Player script and add the following above the class declaration:
using System;
Inside the class add the following new public event:
public event Action<Player> onPlayerDeath;
An event is a C# language feature that lets you broadcast changes in objects to any listeners. To learn how to use events, check out Unity's live training on events..
Edit collidedWithEnemy() to look like the code below:
void collidedWithEnemy(Enemy enemy) {
  enemy.Attack(this);
  if(health <= 0) {
    if(onPlayerDeath != null) {
      onPlayerDeath(this);
    }
  }
}
Events provide a neat way for objects to signal state changes between themselves. A game controller would be very interested in the event declared above. In the Scripts folder, create a new script called GameController. Double-click the file to edit it, and add to it the following variables:
public EnemyProducer enemyProducer;
public GameObject playerPrefab;
The script will need to have some control over the enemy production, as it doesn't make sense to spawn enemies once the Player has perished. Also, restarting the game means you will have to recreate the Player which means...that's right, it will become a Prefab.
Add the following methods:
void Start () {
  var player = GameObject.FindGameObjectWithTag("Player").GetComponent<Player>();
  player.onPlayerDeath += onPlayerDeath;
}

void onPlayerDeath(Player player) {
  enemyProducer.SpawnEnemies(false);
  Destroy(player.gameObject);

  Invoke("restartGame", 3);
}
In Start(), the script gets a reference to the Player script and subscribes for the event you created earlier. Once the Player's health reaches 0 onPlayerDeath() will be called, stoping enemy production, removing the Player object from the scene and invoking restartGame() method after 3 seconds.
Finally, add the implementation of the restart game action:
void restartGame() {
  var enemies = GameObject.FindGameObjectsWithTag("Enemy");
  foreach (var enemy in enemies)
  {
    Destroy(enemy);
  }

  var playerObject = Instantiate(playerPrefab, new Vector3(0, 0.5f, 0), Quaternion.identity) as GameObject;
  var cameraRig = Camera.main.GetComponent<CameraRig>();
  cameraRig.target = playerObject;
  enemyProducer.SpawnEnemies(true);
  playerObject.GetComponent<Player>().onPlayerDeath += onPlayerDeath;
}
Here you're doing a bit of cleanup: you destroy all enemies in the scene and create a new Player object. You then reassign the camera rig's target to this instance, resume enemy production, and subscribe Game Controller to the player death event.
Now return to Unity, open the Prefabs folder and change the tag of all Enemy prefabs to Enemy. Next, make the Player game object into a Prefab by dragging it into the Prefabs folder. Create an empty game object, name it GameController and attach the script you just created. Hookup all the required references in Inspector.
By now you're pretty familiar with this pattern. Try placing the references by yourself and then check your results against the illustration hidden below:
[spoiler]
Game Controller:
- Enemy Producer: Enemy Producer reference from the Hierarchy
- Player Prefab: reference it from the Prefabs folder
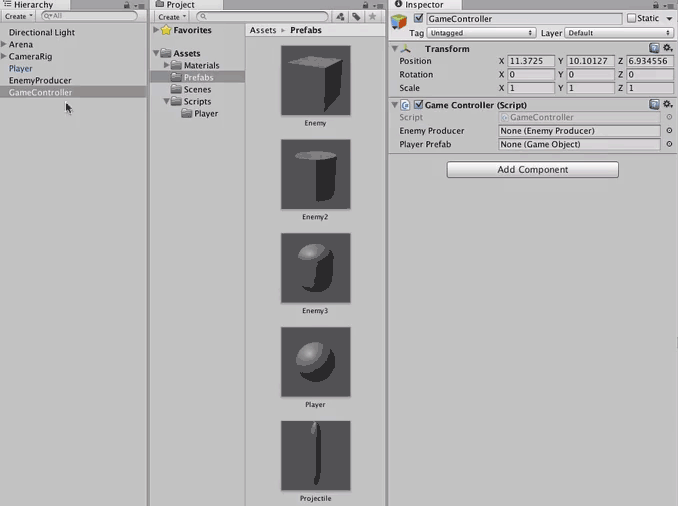 [/spoiler]
Run the game again to see the game controller in action.

That's it – you've scripted your first Unity game! Congratulations! :]
Where to Go From Here?
You can download the completed project here.
By now you should have a good understanding of what it takes to bring together a simple action game. Making games is not a simple task; it definitely takes a lot of work and scripting is only one of the elements needed to bring a project to life. To add a good level of polish, you will also need to add animations and UI to your games. For this reason, I highly recommend checking out our other tutorials on these subjects:
If you're keen to learn how to design, code and publish your own games built in Unity, check out Unity Games by Tutorials.
The book teaches you everything you need to know about building games in Unity, whether you're a beginner or a more experienced game developer. In the book, you'll build four great games:
- A 3D twin-stick shooter
- A classic 2D platformer
- A 3D tower-defense game (with virtual reality mode!)
- A first-person shooter
I hope you enjoyed this tutorial and found inspiration to take a crack at that game you always wanted to create. Questions or comments? Join the discussion below!


Comments